
To personalize how clients interact with your booking platform, open the left sidebar and click on Customize.
This area of Bookablesites lets you tailor the look, structure, and functionality of your booking website and form. You can adjust settings related to:
- Additional data fields and chatbot interaction
- Booking form design and layout
- Customer account and login options
- Employee selection behavior and automation logic
- Languages, labels, and translations
On the Customize page, the features are organized into grouped sections with multiple subcategories. The key sections include:, please visit this page.
- Booking Website, divided into:
- General
- Theme and Appearance
- Hero Section
- Footer Section
- Services Page
- Employees Page
- Custom Code
- Booking Form Steps, divided into:
- Language
- Labels
- Custom Fields (a feature that must be enabled from your feature setting before it appears), divided into:
- Customer
- Appointment
If you enable the ChatBot feature, feature is enabled, its settings will appear just below Custom Fields.
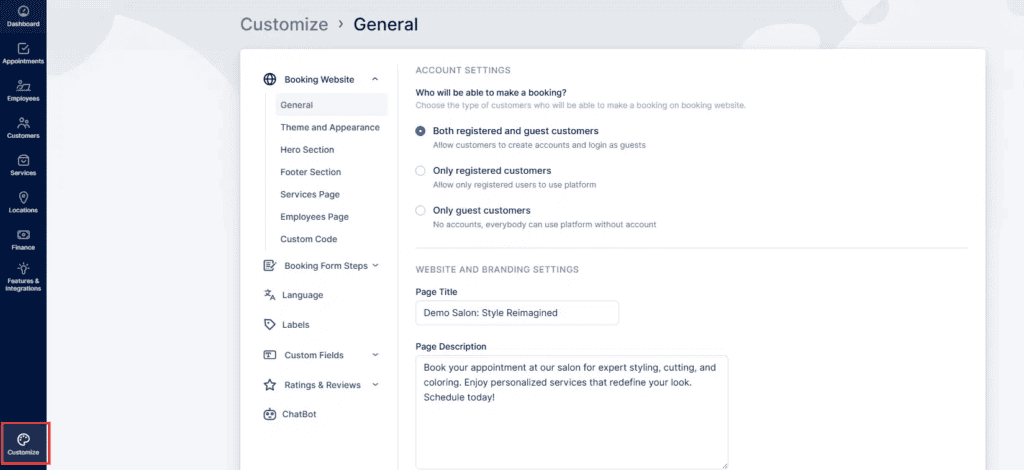
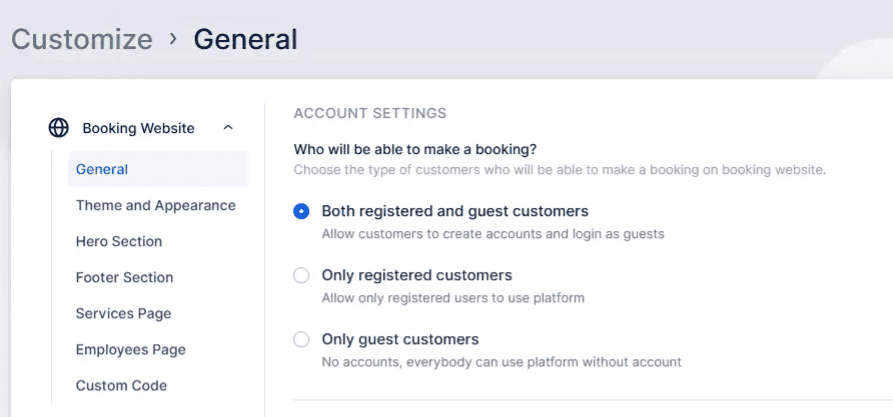
Booking Website
General
When you first enter the Customize section, the Booking Website category automatically expands to show the General tab. This tab includes two key configuration groups: Account Settings and Website & Branding Settings.
Account Settings: This option defines who can make bookings through your Bookablesites website. You can select one of three modes:
- All customers – both registered users and guests can book appointments.
- Guest users only – restricts scheduling to non-registered users.
- Registered users only – only logged-in users can book through their customer accounts.
Registered users can log in using the Log In button at the top-right corner of your booking site (added automatically when registration is enabled). Guest users can still view and update their appointments directly from their booking confirmation email.
These settings let you balance convenience with control—either promoting account creation for ongoing customers or allowing quick, frictionless guest bookings.
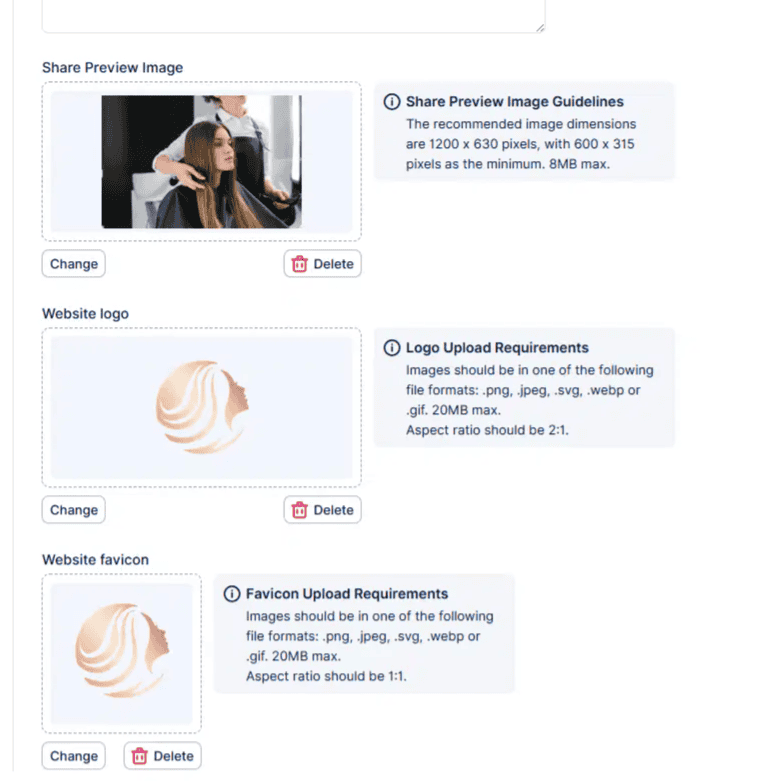
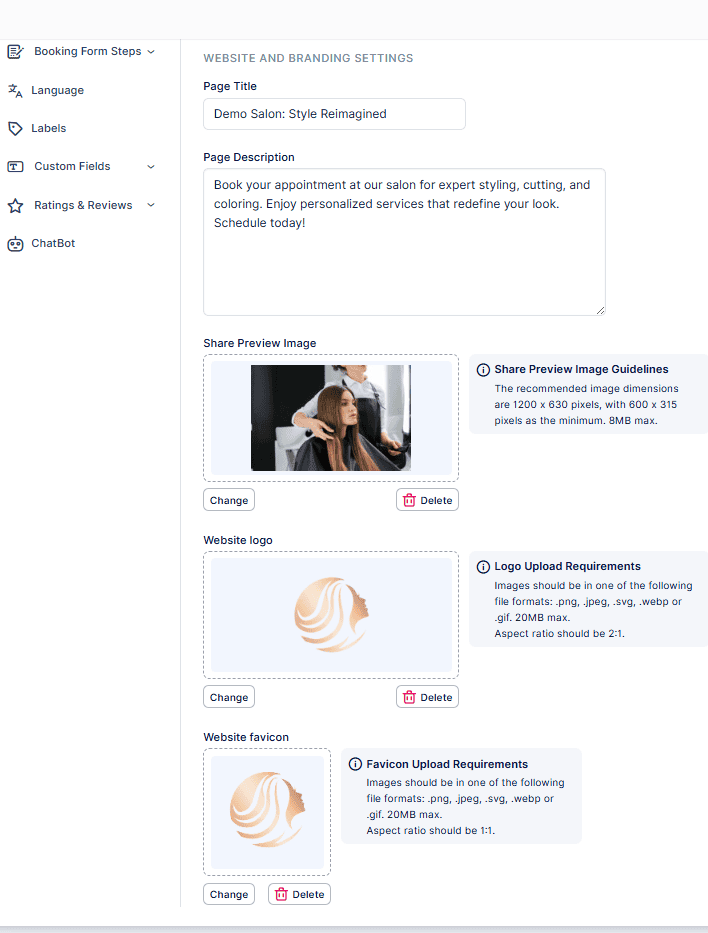
The Website and Branding Settings offer a range of customization options for your booking website:
- Title: Set your site’s name as it appears in browsers and search results.
- Description: Add a meta description to improve SEO visibility and help search engines better understand your business.
- Share Preview Image: Choose an image displayed when your website link is shared on social platforms or messaging apps.
- Website Logo: Upload your company logo to display consistently in your website’s header and footer.
- Favicon: Add a small browser-tab icon to make your site instantly recognizable.
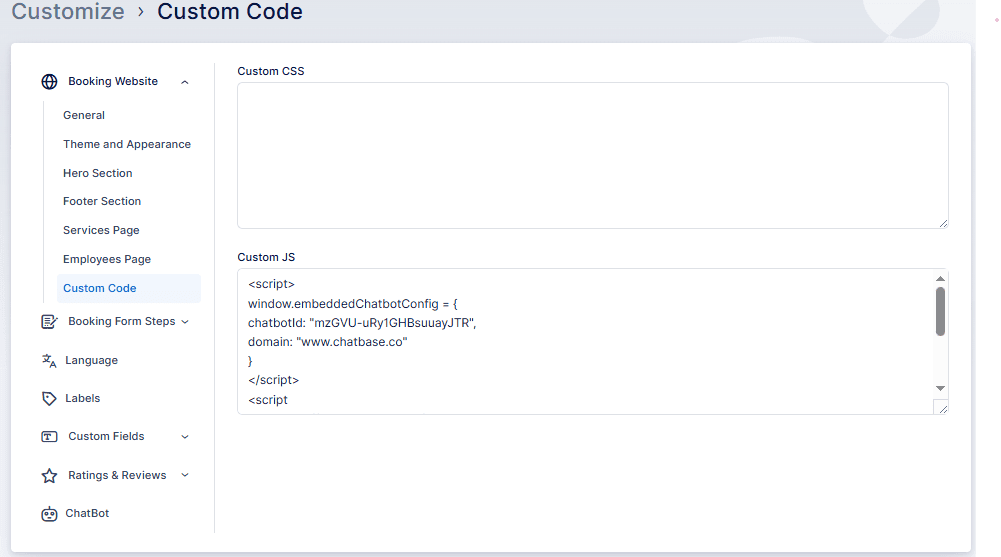
Custom Code
In this section, you can add your own CSS or JavaScript code to extend or style your site.
The Custom Code feature gives you full flexibility to:
- Embed third-party widgets or tracking tools
- Customize layouts and colors beyond default styling options
- Add functional scripts (for example, chat widgets or analytics integrations)
For a library of sample scripts and further guidance, see the dedicated Custom Code this page.
Booking Form Steps
General
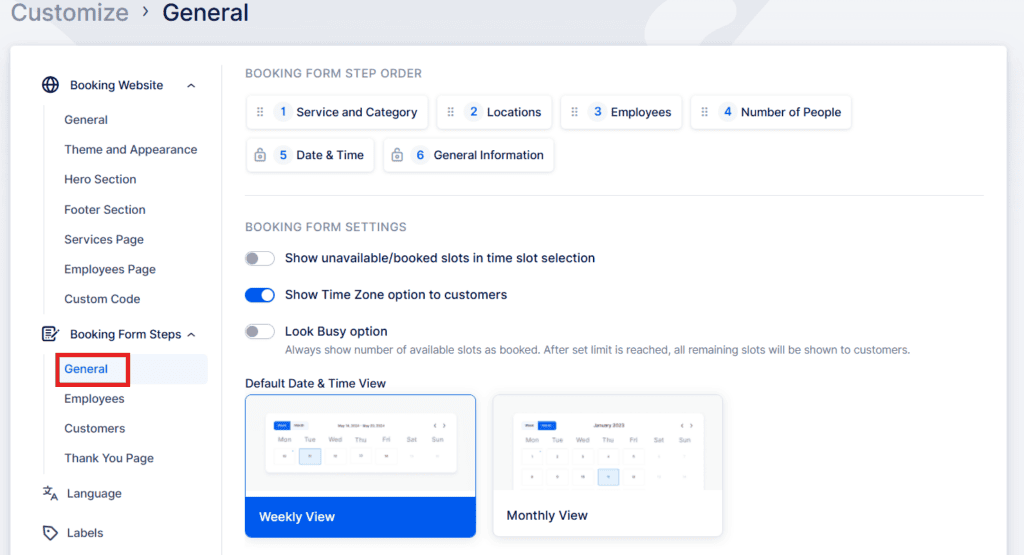
This subsection controls how the booking flow is displayed and structured for customers.
Key features include:
- Reorder Booking Steps: Drag and drop steps to arrange them as you prefer. (Note: The General Information step—where customer details are entered—is always last and cannot be moved.)
- Recurring Appointments / Resources Integration: When either of these features is enabled, the Date & Time step automatically becomes the fifth step and cannot be repositioned.
Additional options:
Default Date & Time View: Select whether the booking calendar initially shows a weekly or monthly layout (customers can toggle between them)..
Show unavailable/booked slots: Lets customers see which time slots are already taken (they’ll appear grayed-out).
Show Time Zone selector: Displays each customer’s local time zone during date & time selection—particularly useful for remote or international appointments. Example: if your employee’s time zone is UTC and the customer’s is UTC+4, the same appointment would appear as 07:00 to the employee and 11:00 to the customer.
Look Busy option: Creates a busier-looking schedule by marking a percentage of available slots as booked. You can choose whether these appear earlier or later in the day.
Default Date & Time View: Select whether the booking calendar initially shows a weekly or monthly layout (customers can toggle between them).
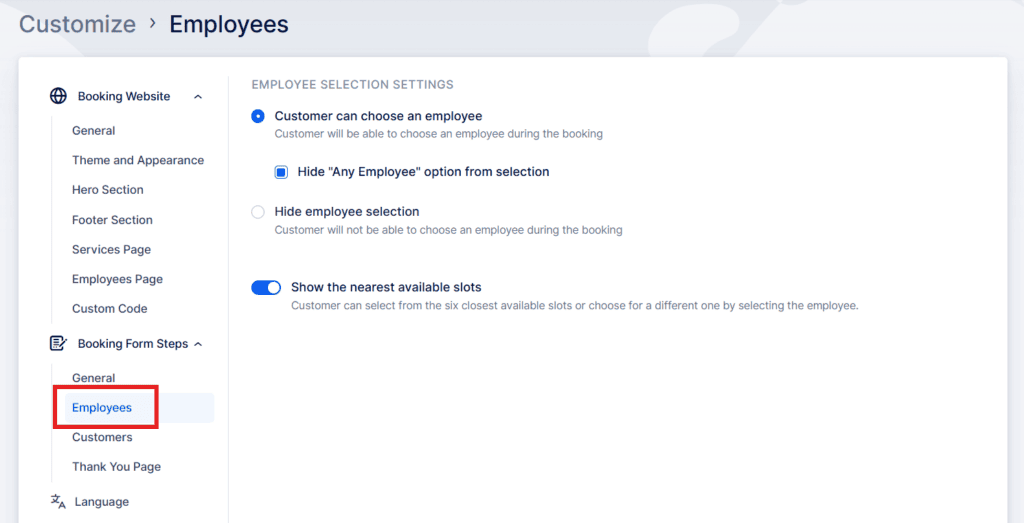
Employees
In the Employee Selection Settings, you can choose whether clients are allowed to pick an employee for their appointment. You can also define the rules used to assign an employee when a customer does not pick one. Enabling the “Customer can choose an employee” option lets clients select a specific employee for their booking or choose “Any Employee,” which will have the system assign an employee according to the selection rules.
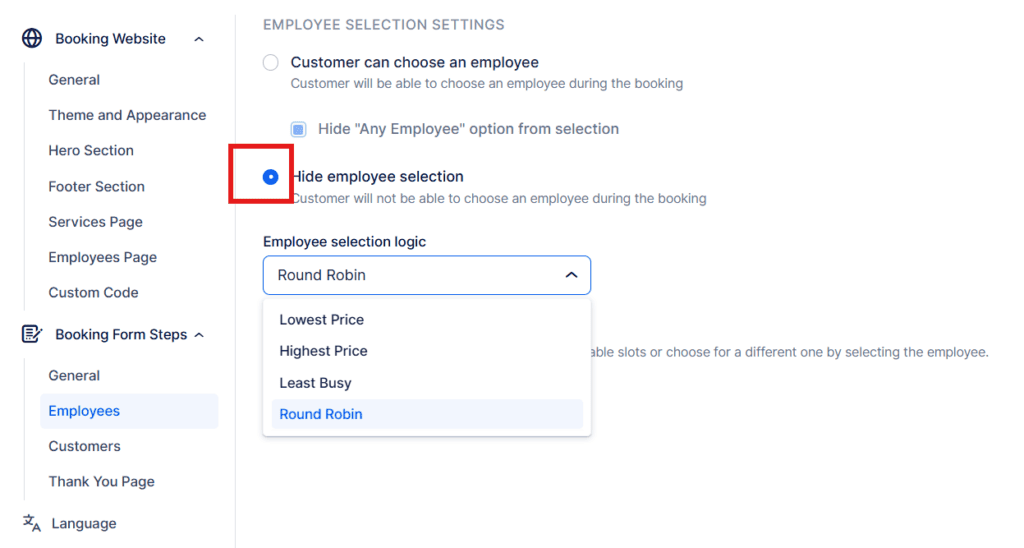
“Any Employee” choice on the Bookablesites and must pick a particular employee. To remove the entire employee selection step from the Bookablesites, enable the “Hide employee selection” option.
If a customer does not select an employee, you can define the logic for automatic assignment using one of several methods:
- Round Robin: Employees are assigned in order to balance workloads evenly.
- Least Busy: Chooses the employee with the fewest total bookings.
- Highest/Lowest Price: Assigns based on pricing structure.
By default, Bookablesites displays each employee’s nearest available time slots during booking, providing a faster, more convenient selection experience. This can be disabled if desired.
By default, Bookablesites displays each employee’s nearest available time slots during booking, providing a faster, more convenient selection experience. This can be disabled if desired.
Customers
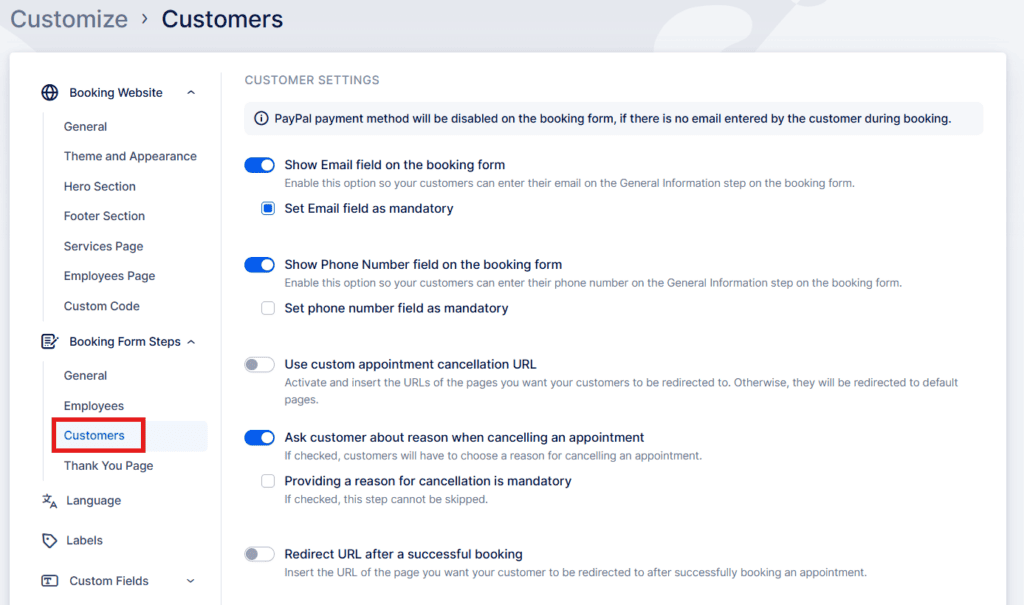
Manage what personal data is collected and how customer interactions behave on the booking form.
Settings include:
- Show Email Field: Display and optionally require an email field. Leaving this optional allows bookings without email; however, mandatory email entry is needed for certain payment methods (like PayPal).
- Show Phone Number Field: Toggle on or off, and make it required if necessary.
- Custom Appointment Cancellation URLs: Redirect customers to your own branded success or failure pages after a cancellation attempt.
- Ask for Cancellation Reason: Allow or require customers to provide a reason for canceling.
- Redirect After Successful Booking: Send customers to a specific “Thank You” or confirmation page after completing an appointment.
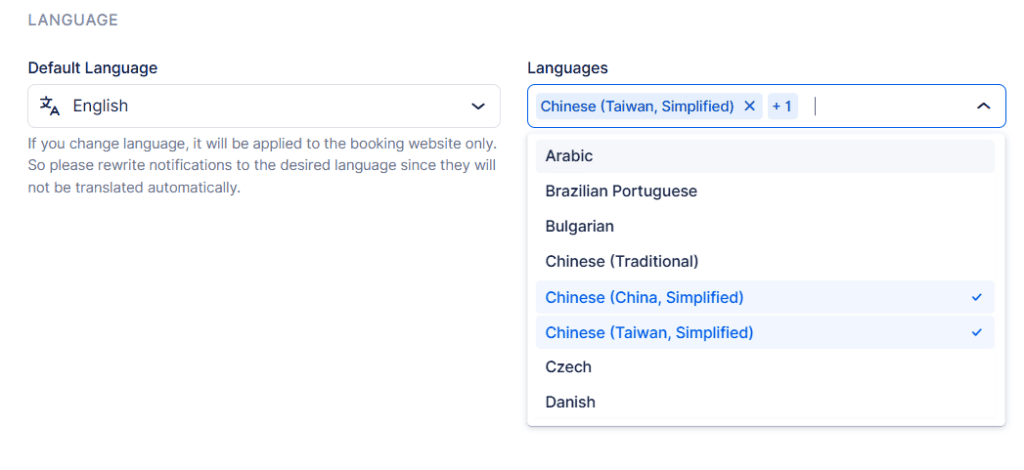
Language
The Language section allows you to translate your booking website and invoices. Supported languages include Arabic, Portuguese (Brazil), French, German, Spanish, Italian, Japanese, Russian, Chinese (Simplified and Traditional), and many more.
Please Note The backend (Admin Interface) is currently available in English, Czech, Serbian, and Spanish—this can be managed in the General Settings page.
If multilingual support is disabled, you can set just one language for the booking site.
If enabled, you can add multiple languages and allow customers to select their preferred language from a dropdown menu.
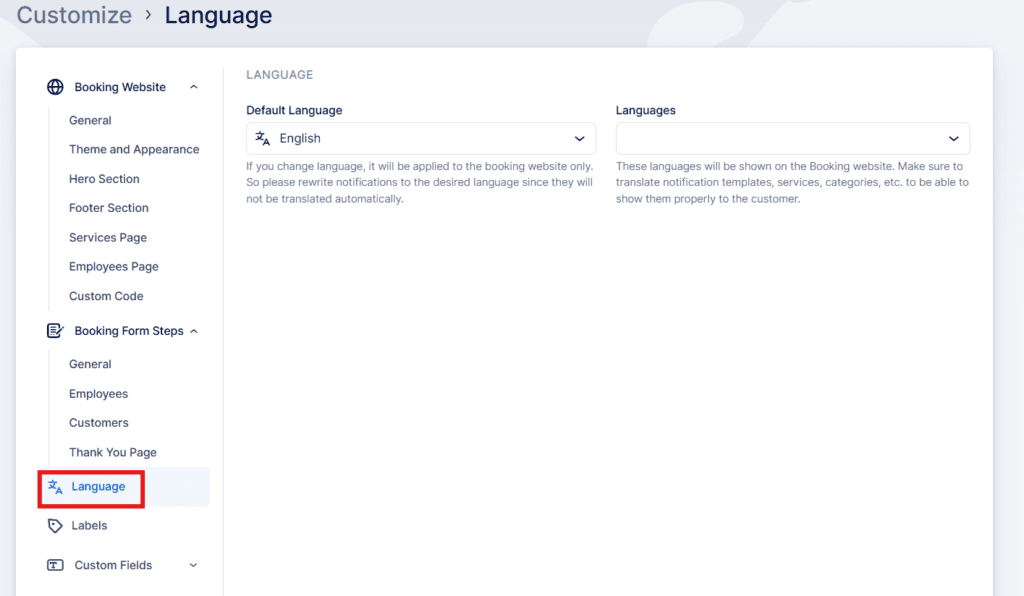
- With Multilingual Support enabled, you can configure the default website language and add additional languages for customers to choose from the language drop-down menu on the booking website.
Labels
Within the Labels section, you can edit nearly 60 text labels that appear across the booking form (e.g., button text, section titles, messages).
If a label is left blank, Bookablesites uses its default text.
You can edit labels for each language separately using the Change Labels for dropdown.

Custom Fields
The Custom Fields section allows you to capture extra information from customers or about appointments.
Types of fields include:
- Appointment Fields: Gather additional details related to a single booking—like preferences, special instructions, or required notes.
- Customer Fields: Collect general customer-specific data (e.g., contact preferences or membership information).
These fields let you tailor the booking process to your business needs.
For detailed instructions on setting up and managing these custom fields, please refer to the Custom Fields page.
This page provides comprehensive guidance on creating and utilizing custom fields to tailor your booking process to your unique needs.
Chatbot (Beta)
Bookablesites’ ChatBot streamlines scheduling by allowing customers to interact conversationally with your booking system. Through real-time responses and guided dialogue, customers can ask questions, check availability, and book appointments effortlessly.
This feature helps enhance user convenience, reduce booking friction, and improve overall engagement. Checkout this page.