
This guide explores the range of personalization tools available within the Customize section of Bookablesites. Here, you can refine the visual design of your booking platform—adjusting colors, selecting themes, and choosing font styles—to match your brand identity and create an engaging visual experience for your customers.
If your goal is to configure Booking Options Customization, please refer to the corresponding section linked below. click here.
Within Bookablesites, the Customize area is organized into five main groups, each containing its own subcategories. These sections help you fine-tune the look, feel, and functionality of your booking website.
The sections covered in this article are listed below. For information on additional customization categories, please visit the related help page.
- Booking Website, Subdivided into:
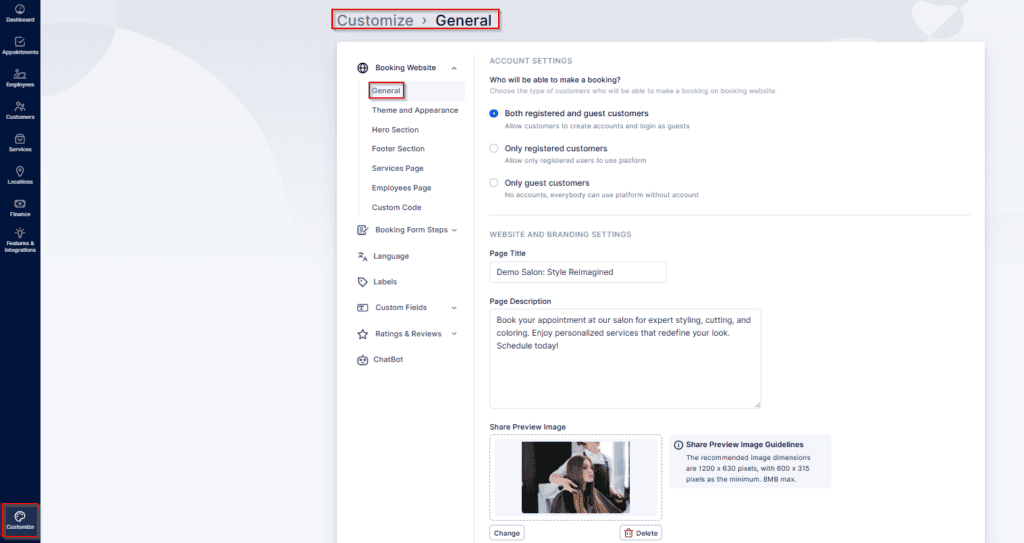
- General
- Theme and Appearance
- Hero Section
- Footer Section
- Services Page
- Employees Page
- Custom Code
- Booking Form Steps, Subdivided into:
- General
- Employees
- Customers
- Thank You Page
- Language
- Labels
- Custom Fields (please note that this section is a custom feature that needs to be enabled before it appears), divided into:
- Subdivided into:
- Customer
- Appointment
- If the ChatBot feature is activated, its configuration settings will automatically appear just below the Custom Fields section, as shown in the provided screenshot.
Additionally, if you have enabled the ChatBot feature, feature is activated, its configuration settings will automatically appear just below the Custom Fields section, as shown in the provided screenshot.
Booking Website
Theme and Appearance
In the Theme & Appearance section, you can choose from eight professionally designed themes, each available in both Light and Dark versions. These themes allow you to control the overall aesthetic of your booking site, ensuring it aligns seamlessly with your brand identity and preferred visual style.
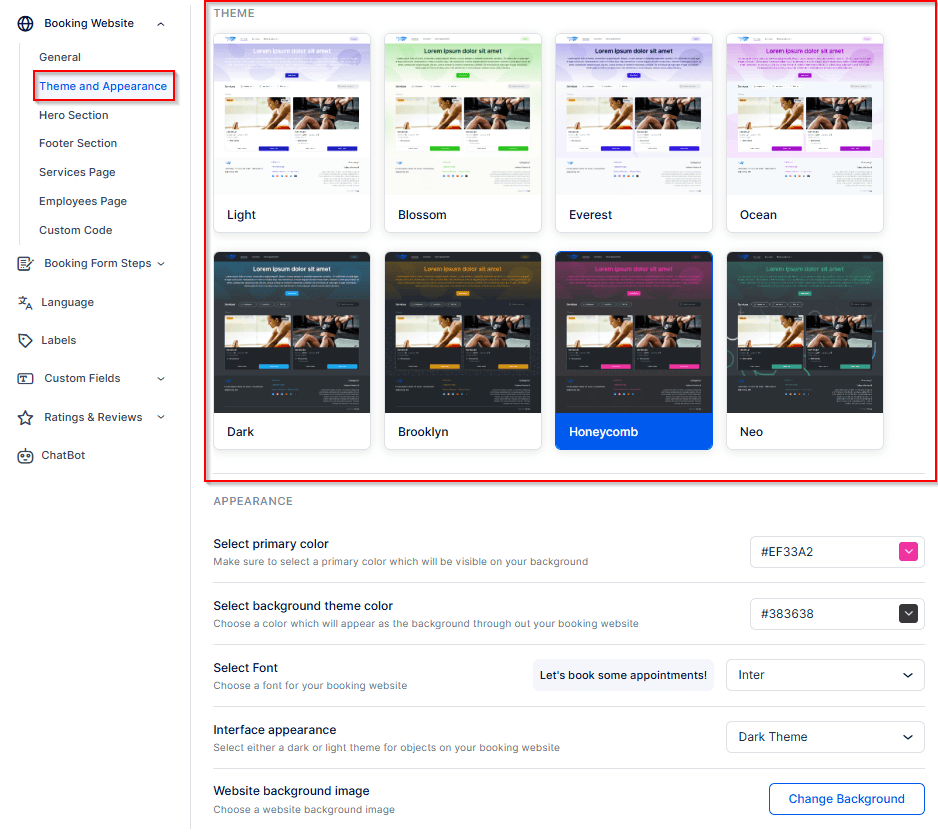
After selecting a theme in Bookablesites, you can further personalize it to reflect your brand identity and style. The following options allow you to fine-tune the look and feel of your booking website:
- Select Primary Color: Choose a primary accent color for your website. You can select from preset color options, open the color picker next to the HEX code to pick a custom shade, or manually enter a specific HEX code to match your brand’s color palette.
- Select Background Theme Color: Define the main background color for your booking site. This sets the overall tone and enhances consistency with your brand visuals.
- Select Font: Choose from a variety of modern, easy-to-read fonts such as Inter, Roboto, Montserrat, Poppins, Archivo, Maven Pro, and Roboto Slab. Each selection updates instantly, so you can preview your website’s text style in real time. Additional font customization options are available under the Custom Code section.
- Interface Appearance: Decide how interface elements—like service cards and individual service pages—are displayed. You can select either a light theme for a clean, bright look or a dark theme for a sleek, modern design with black accents.
- Website Background Image:Personalize your background by choosing from eight distinct background patterns, each of which can be recolored to match your business’s branding and aesthetic.
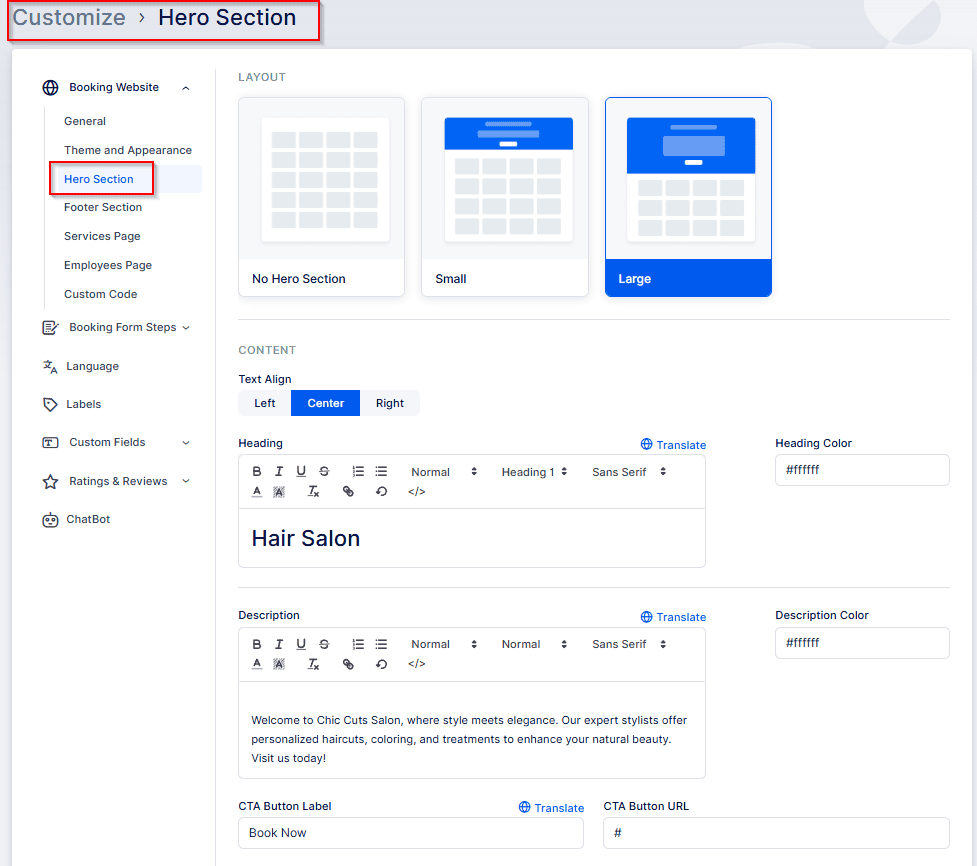
Hero Section
The Hero Section in Bookablesites allows you to further personalize your booking website’s main visual area and make a strong first impression. Here, you can define the size of the hero banner and customize its content, including the heading, supporting text, and text alignment.
You can also add a Call-to-Action (CTA) button that directs customers to another webpage. Simply enter the desired URL in the provided field—when clicked, the link will open in a new browser tab.
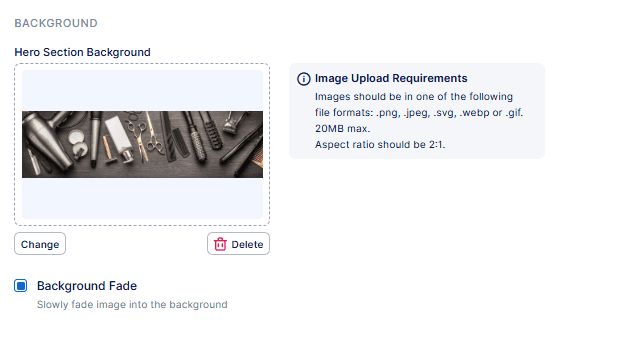
To add an image to your Hero Section, scroll down to the “Hero Section Background” section. Here, you can also apply a background fade effect.
Footer Section
Note: The options visible in the Footer Section depend on the selections you’ve made in the Footer Layout step. For example, if you turn off the “Custom Text” toggle, the input field for entering your own footer text will no longer appear.
In Bookablesites, you can also personalize the Footer Section of your booking website to align with your overall design. Start by selecting which elements you want displayed, then choose your preferred layout — either a two-column or three-column arrangement — to organize your footer content in a clear and professional way.
The logo you’ve uploaded in the Header Section can also be displayed in your website’s footer. Within the Logo settings, you can adjust its display size—choosing between a small or large version—to ensure it fits seamlessly with your footer layout and overall design.
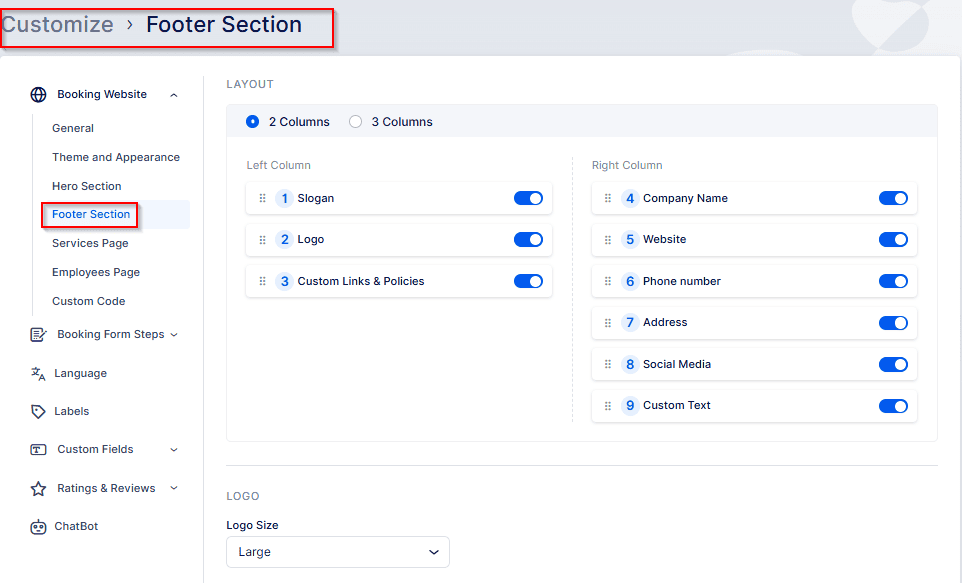
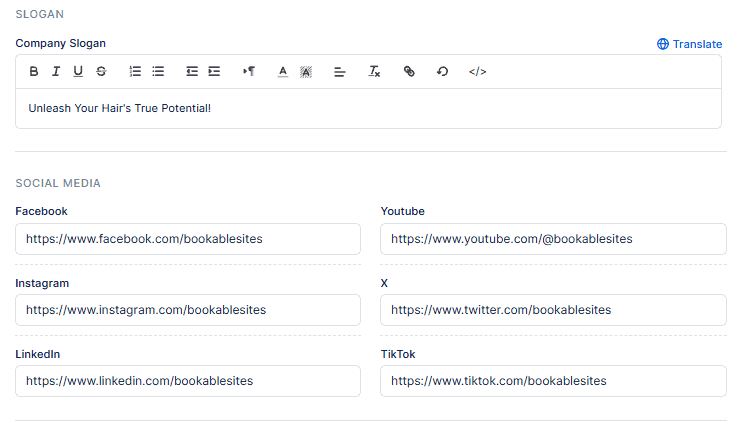
When this option is enabled, your company’s slogan will be displayed, followed by clickable icons linking to your social media profiles — including Facebook, YouTube, Instagram, X (formerly Twitter), LinkedIn, and TikTok. In this section, you can enter your brand’s slogan and add the URLs for each of your social media pages to connect visitors directly to your online platforms.
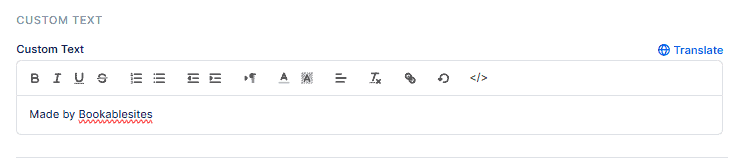
Custom Text field may be useful for your customers’ user experience.
Custom Links & Policies

Custom Links let you enhance your booking website by adding relevant or informative links that improve navigation and user experience. These links appear at the bottom of your booking page and can direct visitors to external resources such as contact pages, terms of service, privacy policies, or any other helpful content.
Custom Policies or Features give you a way to communicate essential details—like company terms, liability disclaimers, or service agreements—to your clients. These policies are displayed both at the bottom of your booking site and again on the final step of the booking process, ensuring visibility and transparency.
To make sure customers have reviewed and agreed to your policy, enable the “Show acceptance checkbox” option. When active, this setting requires users to check the box to confirm policy acceptance before completing their booking.
Once added, the social media links and custom links & policies or features will appear in the footer of your booking website:

The final section, labeled Company Info, functions as an informational area that automatically pulls your company details—such as business name, address, website, and phone number—directly from Settings → Company Settings. A convenient hyperlink is included in this section, allowing you to open the Company Settings page instantly if you need to review or update any of this information.

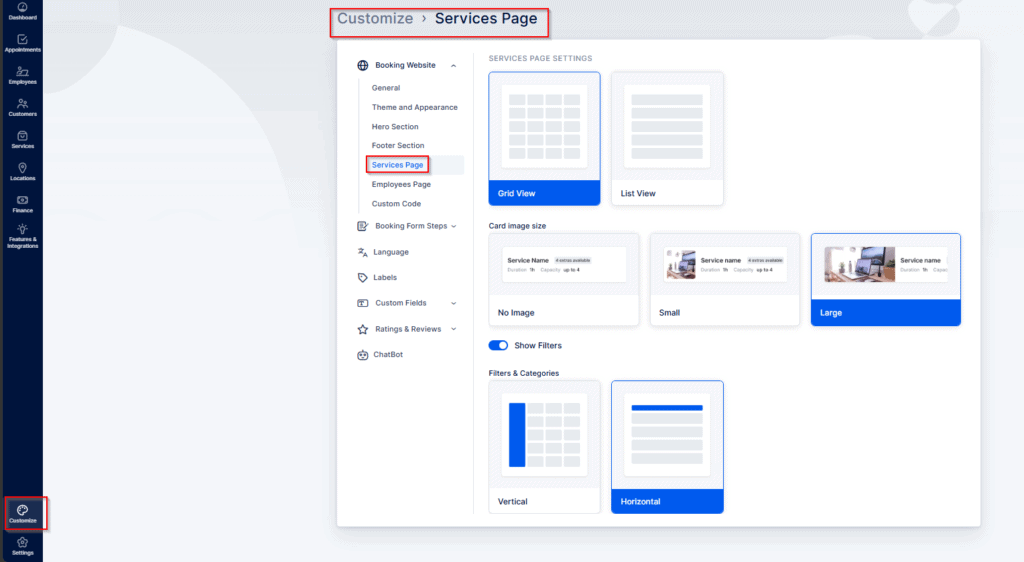
Services Page Settings
Within the Services Page Settings of Bookablesites, you can control how your services are displayed on the booking website’s Services page. Here, you can choose the preferred layout style for the services section, adjust the size of service images, and decide whether to display filters on the page. If filters are enabled, you can also select their orientation—either horizontal or vertical—to best suit your website’s design.
Employees Page Settings
In Bookablesites, the Employees Page Settings let you control how your team members are presented on your booking website. At the top of this section, you can choose whether to enable or disable the Employees Page entirely. You can also select the preferred display layout, opting for either a grid view or a list view to best showcase your staff.
For additional customization, you can adjust the employee cards to display no image, a small image, or a large image, depending on the visual style you want to achieve. You also have the option to show or hide filters. When filters are visible, they can be arranged vertically in a sidebar beside the employee listings or horizontally in a row above them.
Each employee card can also display their average star rating and customer reviews, provided that this feature has been enabled the Ratings & Reviews feature.

Booking Form Steps
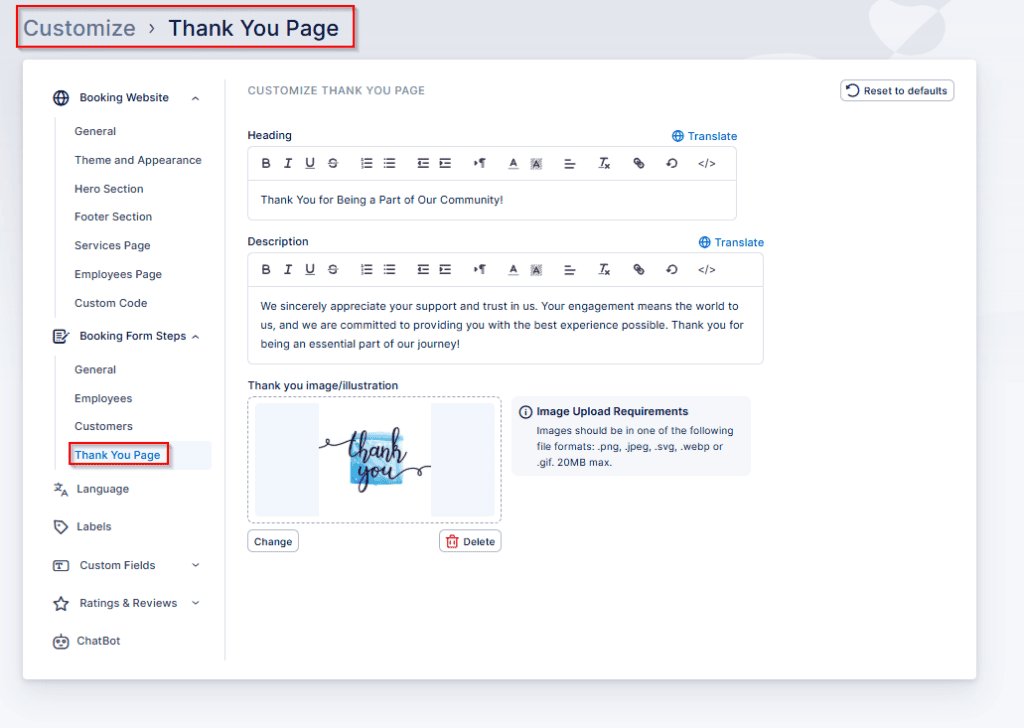
Customize Thank You Page
In Bookablesites, the Customize Thank You Page section lets you personalize the message your customers see after successfully completing a booking. You can modify the image, heading, and description displayed on this page—replacing the default “Thank you!” message, the “Your appointment is scheduled. We appreciate your trust and look forward to seeing you.” text, and the standard icon with your own custom content.
As shown in the example below, if you’ve added multiple languages in the Language Settings, you’ll be able to translate each of these elements for a multilingual experience.
Located in the upper-right corner, the Reset to Defaults option allows you to restore the “Thank You” page content back to Bookablesites’ original default settings.
 Professional Premium Plan