
Connect with WhatsApp to streamline customer communications. By setting up message templates through Meta’s (Facebook) business platform, you can leverage this feature alongside SMS and email alerts.
The WhatsApp connection for BookableSites is classified as a premium feature and counts toward your allocated Custom Features & Integrations limit.
To enable WhatsApp functionality, navigate to the Features & Integrations area within BookableSites. Locate WhatsApp and select “Enable“. Once activated, the interface will update to display a “Set Up” option. Select this to open the WhatsApp setup interface
Configure Your Business Account
Access this link to sign in or establish your Facebook Developer Account. You may utilize either your individual or business Facebook credentials for authentication.
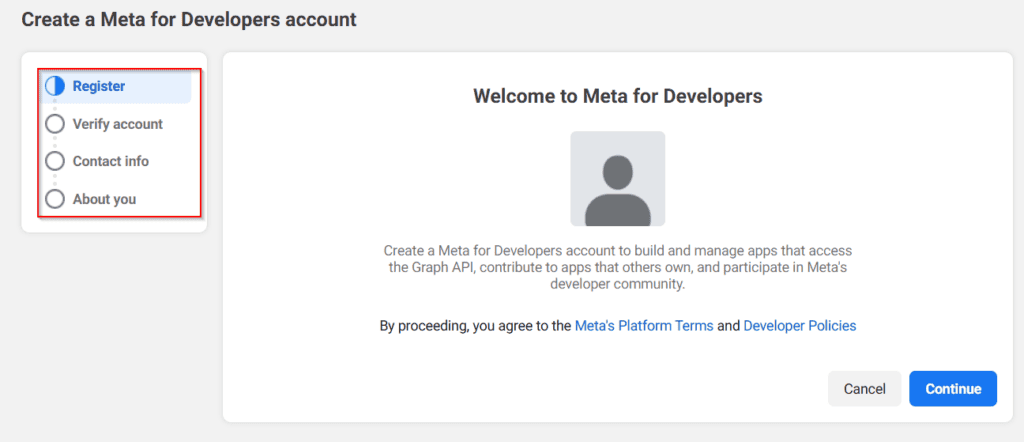
If you don’t have an account on Facebook yet, registration is required first. After account creation or login, you’ll arrive at the Facebook for Developers main page. For first-time users, select “Get Started” in the top right area. Existing app developers can choose “My Apps” from the same location.
Registering an Account
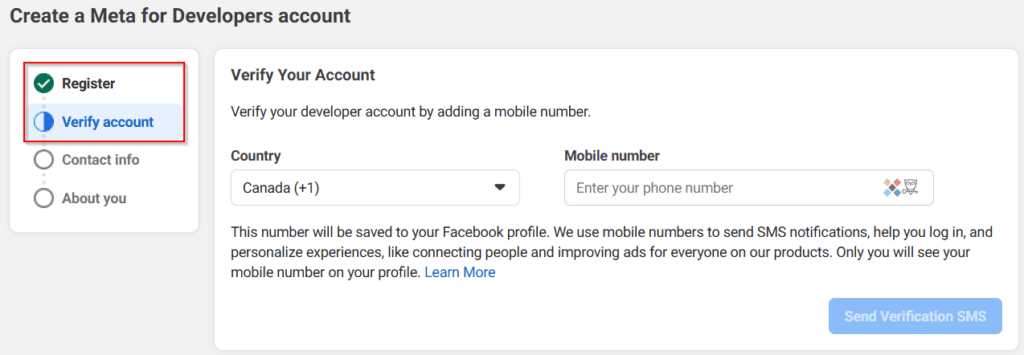
During registration, you must accept Facebook’s Terms and Developer Policies. Account verification follows, which requires either a working phone number (for SMS verification code delivery—ensure you can access this number) or linking a credit card to your account.
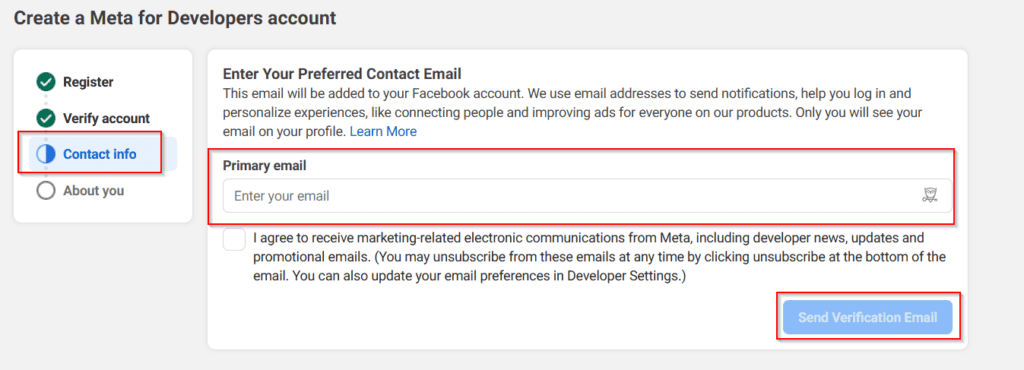
Following verification, confirm that your Facebook-associated email is accurate. To modify it, select “Update Email” in the bottom right section. If the email is correct, choose “Confirm Email” to advance to the next phase.
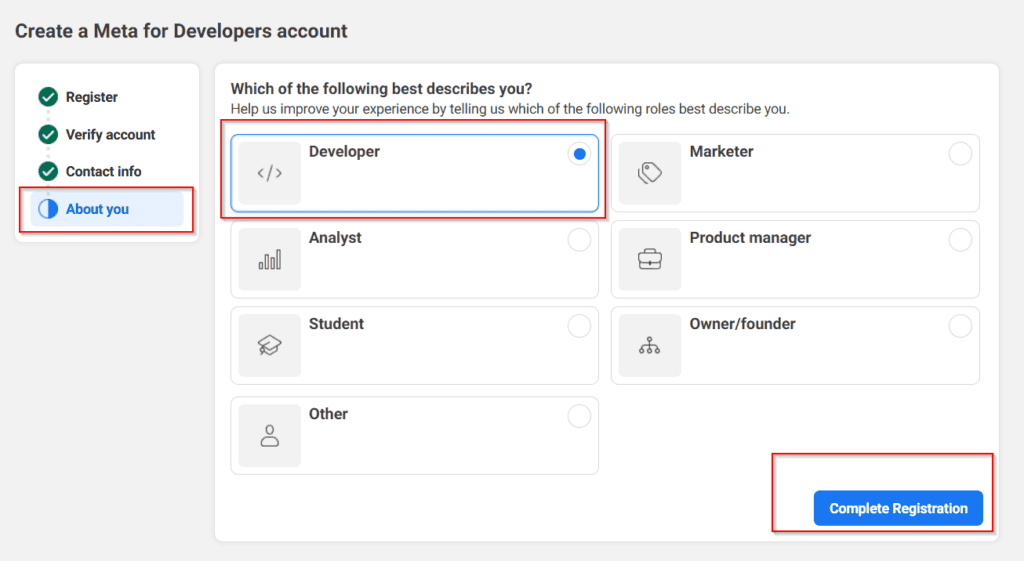
The final phase involves assisting Facebook in personalizing your Facebook for Developers account experience. You may choose “Developer” as illustrated in the image below, or pick an alternative role that better matches your position. After making your selection, click “Complete Registration” to finish the process.
App Creation
Inside the Facebook developer account, you’ll encounter either your existing apps (if you’ve previously used the platform) or an empty interface, as displayed in the screenshot below. Just select “Create App” positioned in the upper right area beside the search field, or within the App list area.

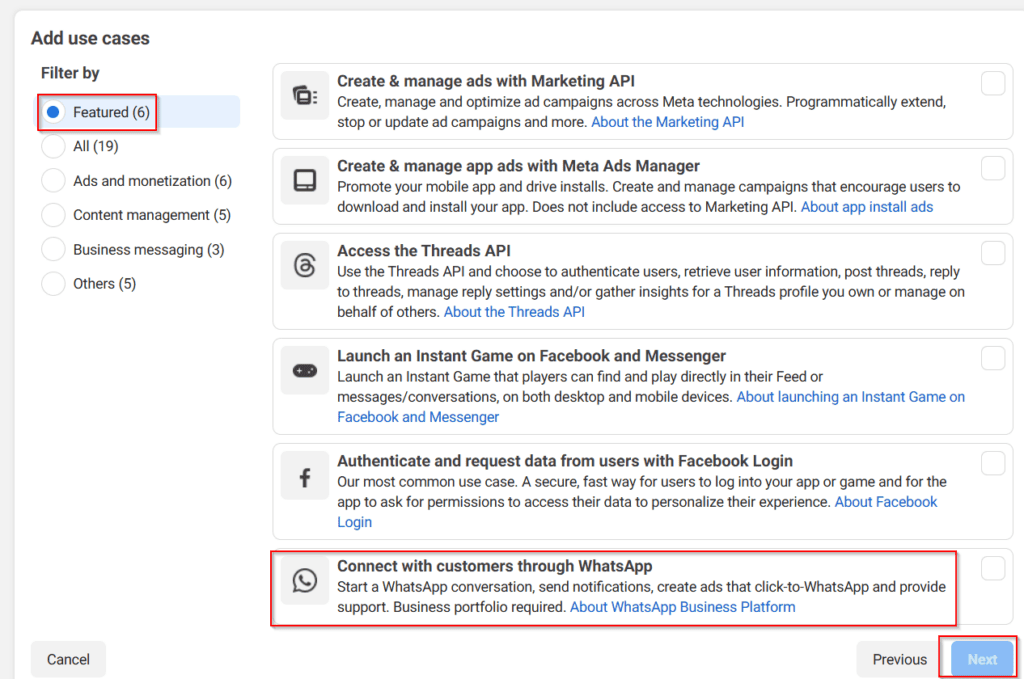
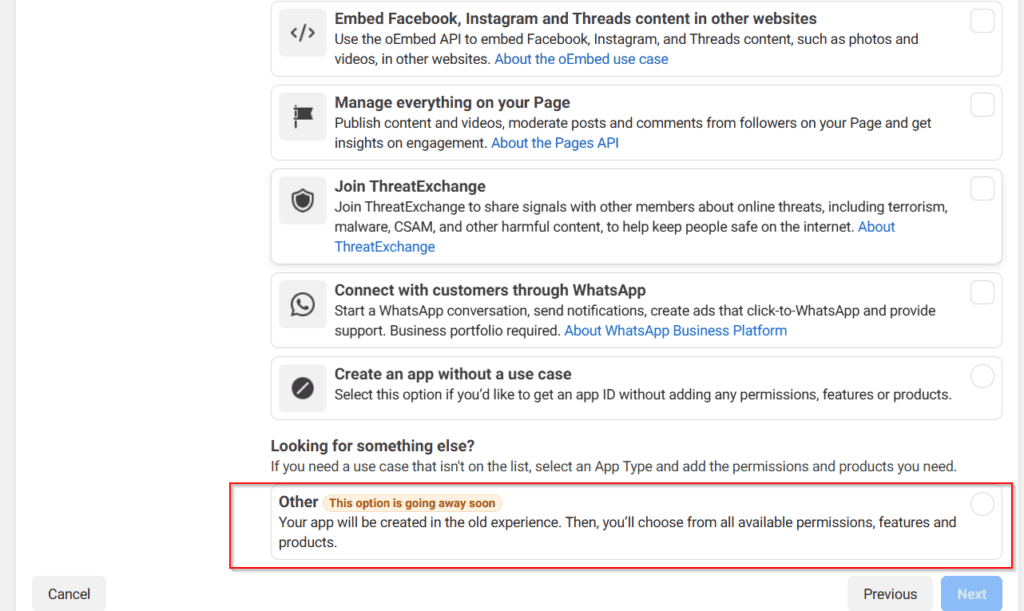
Select App type – Since you need to use WhatsApp for your business, regardless of whether you’re a “One-man show” or an enterprise, you should choose the “Other” type app option and click the “Next” button in the lower right corner.
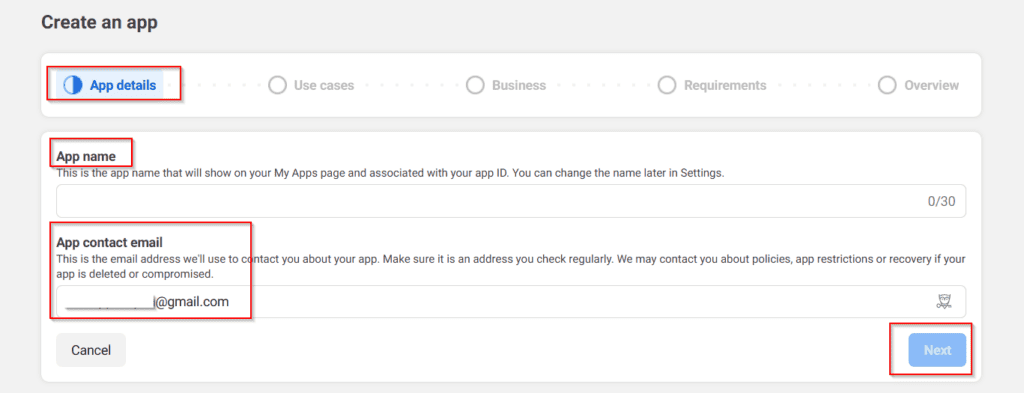
Supply essential details – You’ll only need to specify your app’s display name (this can be modified later). Your login email automatically appears, and selecting a Business Account isn’t required for utilizing WhatsApp with BookableSites. Even if your account connects to a Business Account, there’s no need to choose it.
Facebook enforces limitations on specific terminology like “WhatsApp”. You cannot incorporate Meta’s copyrighted terms or branding components, such as FB, Face, Book, Insta, Gram, and Rift, or any language that might suggest association with Facebook or its affiliated brands, within your application name.
After selecting “Create app,” Facebook will request your password verification. Input your password and press “Submit” to continue.
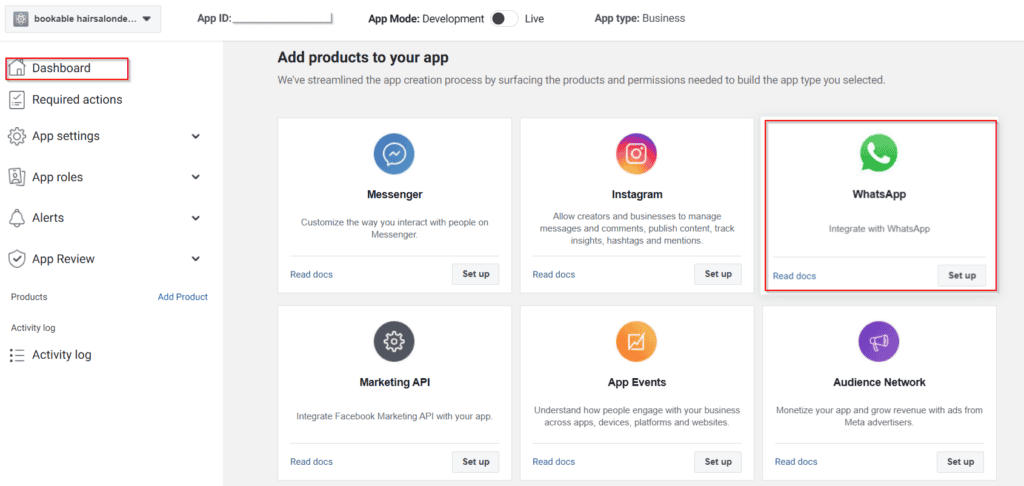
Following app creation, you must integrate a product into the application, namely WhatsApp functionality. Navigate to the bottom of the screen and select “Set up” in the bottom right area of the “WhatsApp” section.
The following phase outlines the features provided through the Business Platform API. Proceeding indicates your acceptance of Facebook’s WhatsApp Business Terms and Meta’s Cloud API Hosting Terms. Press “Continue” to advance.
Based on your account status—whether you possess an existing Business account or have recently established a new account with this being your initial App—you’ll encounter either the Quickstart interface or the Getting Started section. If the Quickstart page appears, select the “Start using the API” option:
This redirects you to the “Getting Started” area, which contains crucial information for app testing: a Temporary Access Token, Phone Number ID, WhatsApp Business Account ID, and the Curl command for message transmission.
Please note: The Phone Number ID and WhatsApp Business Account ID are required for setting up WhatsApp Settings in BookableSites, as illustrated earlier in this guide. Be sure to revisit this page after registering your phone number, which is covered later in these instructions.
Within the “From” field, you’ll see a test number allocated to your account.
The “To” field contains an initially blank dropdown menu. Select “Manage phone number list” to include up to 5 phone numbers that can receive complimentary test messages.
Please note: WhatsApp will deliver a verification code to the supplied phone number. The number cannot be added until you input the 5-digit confirmation code sent to the WhatsApp account associated with that number.
After adding your personal test number, select the blue “Send message” option located at the bottom right beneath Step 2. You’ll then receive a WhatsApp message resembling this:
After receiving the text message, navigate downward on the Facebook for Developers interface. Bypass steps 3 and 4, and directly select “Add phone number” located in the lower right section:
This will bring up a modal where you add your business name (customers will see this name on WhatsApp when receiving your messages), business email (must be valid as confirmation is required), your country, and business website.
Once you’ve filled out this information, click on “Next” in the bottom right corner:
The next pop-up will ask for the timezone, business category, and business description. Fill in the details carefully and click the “Next” button in the bottom right corner.
Enter your business’ official phone number that will be used for BookableSites.
Please Note:
Please understand that the phone number you provide must not have any current WhatsApp association. This should be a fresh number without existing WhatsApp connectivity.
Entering a number already registered with WhatsApp (for personal or business purposes) will render it unusable on mobile devices once connected here. We strongly advise obtaining a dedicated new number for this integration to prevent interference with current WhatsApp services.
You may alternatively use your company’s landline number. Choose the “Phone Call” option to enable this feature.
For mobile numbers, select “Text message” to receive your verification code.
Upon clicking “Next” in the pop-up’s lower right section, you’ll receive the verification code.
Following your selection of “Next,” WhatsApp will send an OTP (One-Time Password) to your WhatsApp business number. Input this verification code (OTP) and press “Finish.” This action verifies your number and establishes the connection with your WhatsApp business account.
Having completed the WhatsApp messaging phone number setup, the next step involves transferring this data to BookableSites’ settings. As previously noted, you must revisit the Phone Number ID and WhatsApp Business Account ID sections after registering your number.
- In Facebook for Developers, under WhatsApp/Getting Started, select the newly added phone number from the drop-down list in the “From” section.
- Below it, copy the Phone Number ID.
- In Trafft’s Features & Integrations/WhatsApp -> “Set Up“, paste the Phone Number ID into the designated field.
- Return to Facebook for Developers, copy the WhatsApp Business Account ID.
- Paste the WhatsApp Business Account ID into Trafft’s WhatsApp Settings.
To connect this number with BookableSites, a permanent access token is required.
Within the “Getting Started” area at the top, you’ll see a “Temporary access token” along with a notification stating it expires within 23 hours. This short-term token is unsuitable for BookableSites if you intend to send messages after the 23-hour window. Therefore, creating a non-expiring token is necessary.
- While logged into your Facebook for Developers account, navigate to the Business Settings Page.
- In the left sidebar under the “Users” section, click on “System users.”
- You’ll see a blank page. Click on “Add” to add a new user:
Facebook will occasionally request your acceptance of their Non-discrimination policy. Navigate through this window, examine the policy details, and select “I accept” in the pop-up’s lower right section.
Following this, Facebook will display a “Thank you” confirmation. Press “Done” in the lower right area to proceed with establishing a new user.
Input the username and designate the role as “Admin“. After completion, select “Create system user“:
In the right section of the next screen, click on the “Add Assets” button:
In the pop-up that appears, click on “Apps“, then select the app previously created for WhatsApp integration. Enable the Full Control (“Manage App”) slider, and click on “Save Changes”.
The subsequent window will notify you about the addition of a new asset. Select “Done” to continue.
Following this, navigate to the left sidebar and choose “WhatsApp accounts” within the “Accounts” section. Locate and select your previously established business app (for instance, “Test WhatsApp Business Account”), then press any available “Add People” option:In the pop-up that appears, select the system user previously created, then enable the “Full Control” option, and click “Assign” in the bottom right corner.
A notification will appear confirming the addition of 1 Person to the WhatsApp account. Simply press “Done“.
Subsequently, navigate back to “System Users” in the left sidebar (acknowledge Facebook’s Non-discrimination policy if it reappears), and select the “Generate new token” option:
select the App from the drop-down menu, and scroll down. You will see a few notices, and below them, you’ll find the list of available permissions.
Scroll down and enable these two permissions:
- whatsapp_business_messaging
- whatsapp_business_management
After selecting them, click on the “Generate token” button in the lower right corner of this pop-up.
At last, you’ll receive the permanent token that remains valid indefinitely unless you manually select “Revoke Token”.
Please be aware that Facebook does not retain this token, therefore ensure you copy and store it safely.
Additionally, you can validate the token permissions through Facebook’s token debugger tool to ensure successful token creation.

This is the final item required for the BookableSites WhatsApp Settings page, so insert this token there:

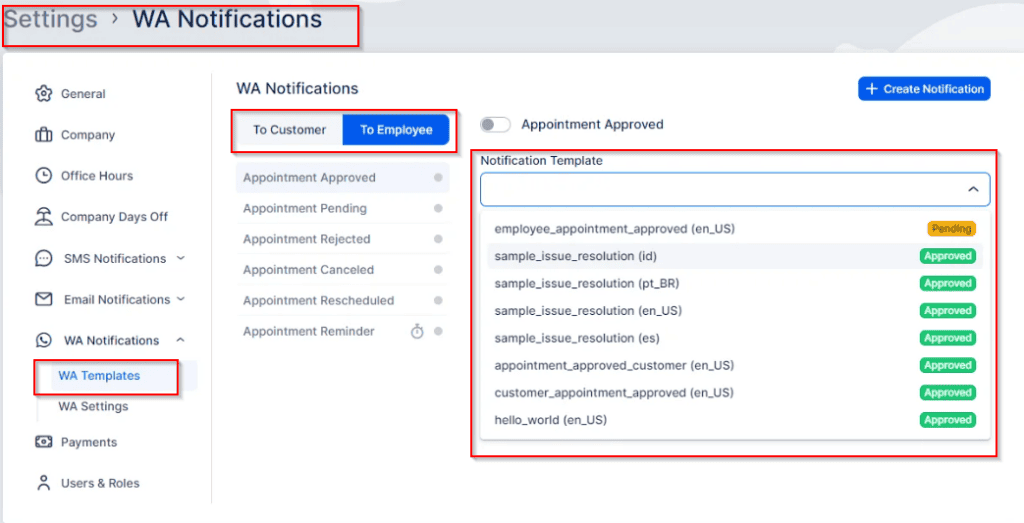
Once these settings are saved, proceed to the “WA Templates” section in BookableSites’ left menu.
Please understand that WhatsApp templates must be configured through the WhatsApp Business account rather than directly in BookableSites. Upon expanding the “Notification Template” drop-down menu in BookableSites, you’ll find example templates supplied by WhatsApp:à

To create templates, you need to access your Business Settings Page, and in the left sidebar, click on the three lines and then click on “WhatsApp Manager“:
In the “Overview” section that appears next, click on the three dots on the right of the WhatsApp account you previously created, and then click on “Manage message templates“:
The next page allows you to develop new templates for use in BookableSites. Select “Create Template” located in the upper right section to start.
While configuring a template, make sure to choose “Marketing” as the category. After it opens, pick the “Custom” option.
Then, enter a template name (consider using identical names found in BookableSites, like “customer_appointment_approved“, “employee_appointment_pending“, and similar) and choose the language matching BookableSites.
After configuration, press “Continue” in the upper right area to advance.
Please Note:
- Template names must use lowercase letters and cannot contain spaces. If you try entering spaces, Facebook will automatically change uppercase letters to lowercase and substitute spaces with underscores.
- Make certain that the languages incorporated in your template correspond with those configured in BookableSites. The primary language is established in BookableSites’ General Settings, and supplementary languages are included via the Customize section. BookableSites will automatically identify these languages during front-end appointment scheduling.
WhatsApp template creation shares similarities with Email and SMS notification templates, though there are some notable distinctions.
The most significant difference lies in how variables (placeholders) are formatted within templates – they must be numeric only. As shown in the screenshot, these placeholders appear as {{1}}, {{2}}, etc., mirroring BookableSites’ double curly bracket format.
Understanding the mapping between variables and BookableSites placeholders is essential. For example, WhatsApp’s {{1}} aligns with BookableSites’ {{service_name}}.
Although Header and Footer sections remain optional, Headers can contain variables whereas Footers cannot. To include a Header, choose “Text” from the dropdown and enter your header content following the provided example. Since Headers exclusively support “Text” format, you must either use this option or skip the header altogether.
WhatsApp mandates providing sample values for placeholders, which facilitates faster template validation on their end.
After completing your template, select the “Submit” button positioned in the top right section.
Every template you generate must be reviewed by WhatsApp, with approval usually completed within approximately one hour. Templates that pass review will show a green indicator reading “Active – Quality pending,” whereas templates still being evaluated will display in gray with an “In review” status, as illustrated in the screenshot below:

Please note:
- After approval, templates become locked and cannot be modified. Editing is only possible for templates that have been rejected. To change an approved template, you must remove the existing version and build a new one.
- WhatsApp prohibits line breaks, tabs, or consecutive sets of 4 spaces within templates. Such formatting will be automatically converted to semicolons ( ; ).
Linking Variables with Bookablesites Placeholders
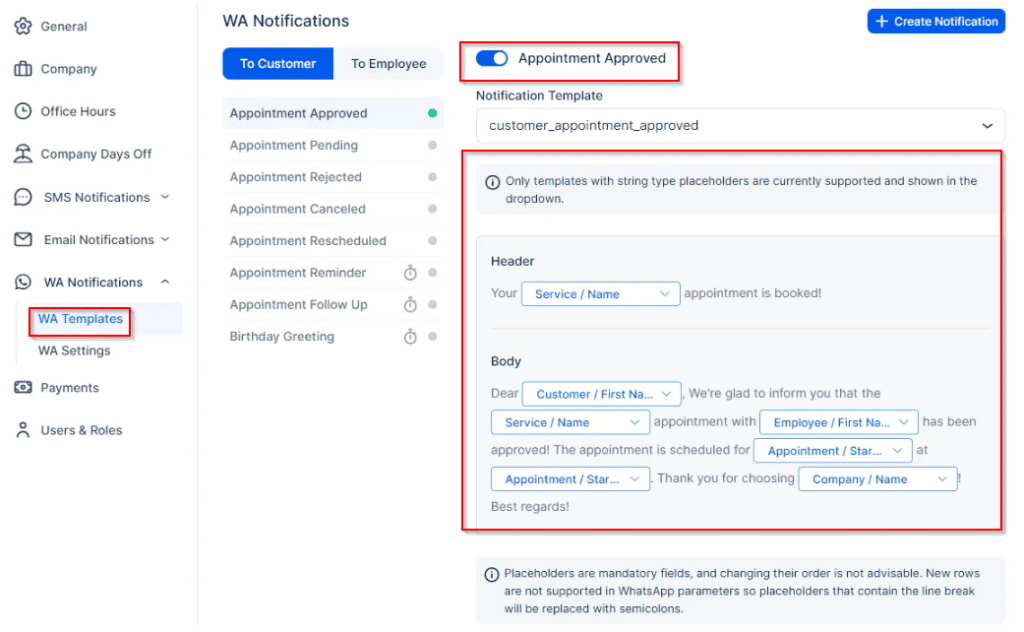
Returning to BookableSites’ Settings/WA Notifications/WA Templates (after refreshing the page), clicking the “Notification template” dropdown reveals all templates created within the application (including both approved and pending templates)..
Choose the template you wish to connect with the BookableSites template you selected (or created), then proceed to map the variables to placeholders.
Header placeholders and message body placeholders function independently, meaning {{1}} in the header differs from {{1}} in the message body. Every variable you included in the WhatsApp message template will appear in dropdown menus, requiring only proper linking.
Initially, connect the {{1}} variable to Category/Service/Name (as shown in this example) within the header. Below this, the WhatsApp-imported message template will be displayed, followed by the section where you can establish connections between variables and BookableSites placeholders:
Don’t forget to click on Save Changes when you’re done linking the placeholders.
Please note:
- Creating a separate WhatsApp account using your business phone number is highly recommended.
- While the Test Account provided by WhatsApp is available, it has limitations – the display name visible to your customers cannot be changed. This results in customers seeing an unreachable phone number as depicted in the screenshot above, preventing them from replying (since receiving messages requires linking an actual phone number to a real account).