
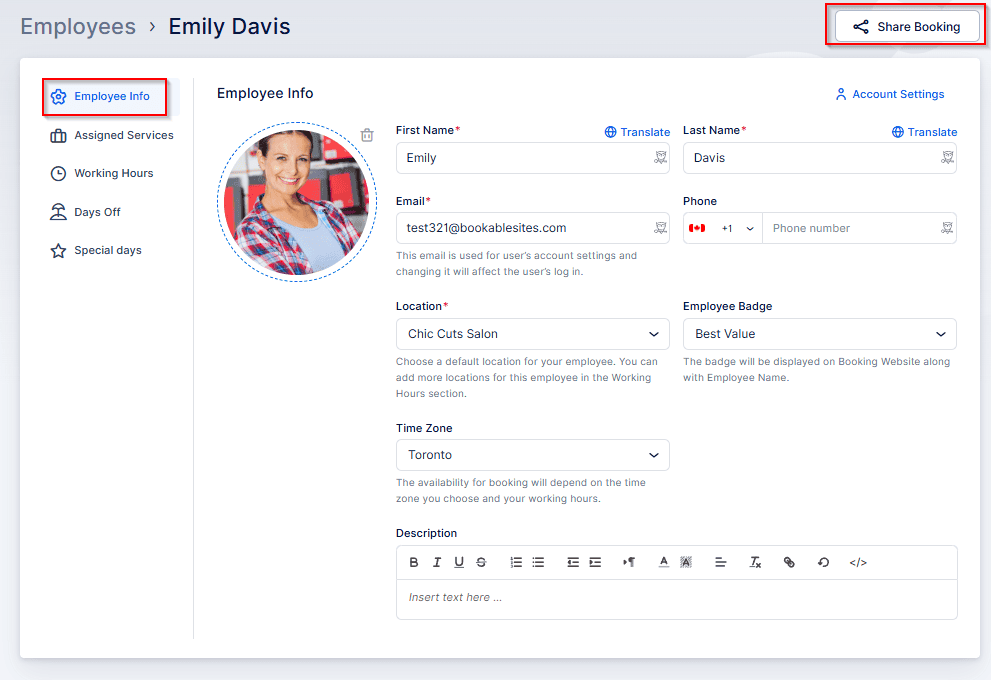
Within the Admin area of Bookablesites, you’ll see a “Share Booking” button located at the top of the page. This feature lets you easily share your available booking times directly with clients.
It’s particularly useful for private services that you may not want to list publicly on your main booking page but still wish certain customers to access. By sharing the link, those clients can conveniently view and book these private services without the need for them to appear on your public site.
When you click this button in Bookablesites, a new modal window will appear, allowing you to select how you’d like to share your availability.
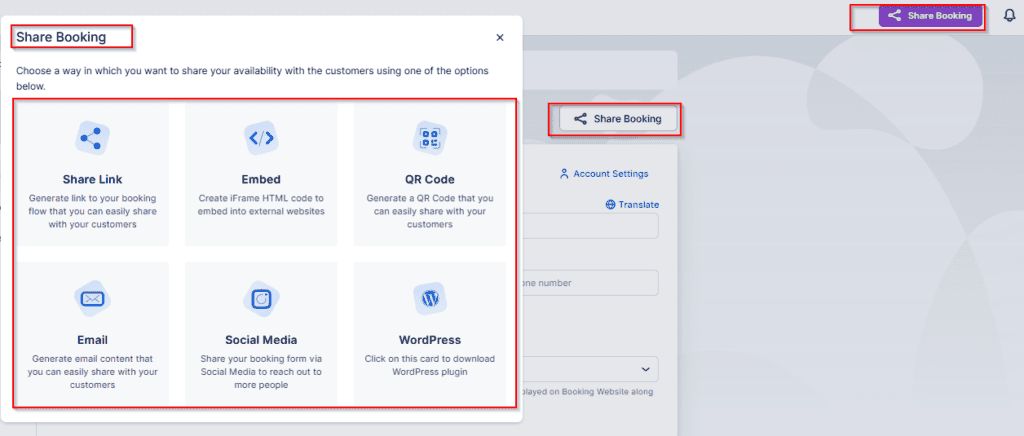
In Bookablesites, selecting the WordPress option will automatically download the WordPress plugin to your device. All other sharing options allow you to customize how availability is displayed by setting parameters such as Service Category, Service, Employee, Location, a specific Date Range, and/or particular time slots.
If the service you choose includes Extras, those options will also appear for selection.
Important notes:
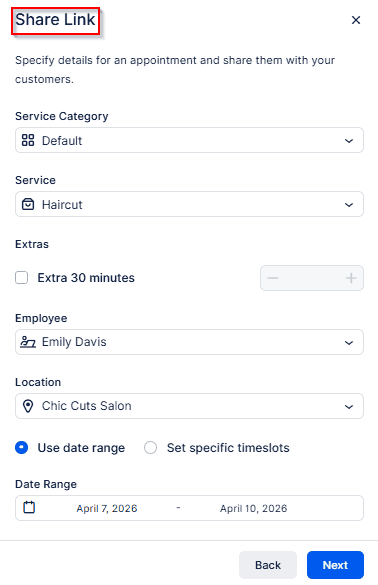
The Set Specific Timeslots setting gives you the flexibility to pick multiple time slots — either several times on one day or different time slots across multiple dates.
If you don’t apply any filters, you’ll be sharing all available categories, services, employees, locations, dates, and times from your booking page.
Each filter uses a single‑selection dropdown, meaning you can only choose one category, one service, one employee, and one location at a time.
The Use Date Range setting lets you choose either a single date (by double‑clicking it) or a range of dates for availability.
Although each sharing method in Bookablesites uses the same set of filters, the final outcome varies depending on the option you choose.
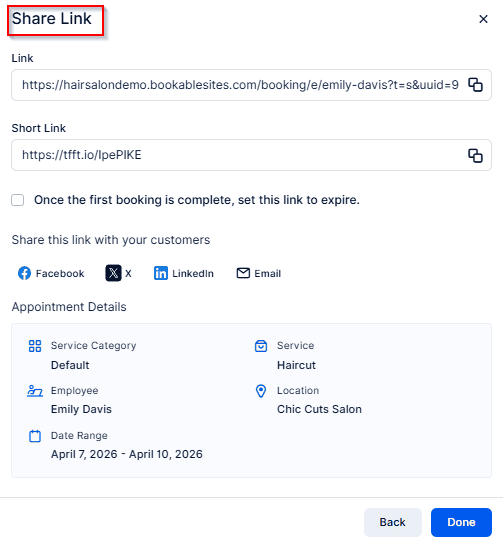
Share Link
When you choose the Share Link option in Bookablesites, a unique link and a shortened version of it are automatically generated. You can copy either link and send it directly to your customers.
Just beneath the short link, there’s a checkbox that, when selected, ensures the link becomes inactive once a booking has been completed through it.
If you use the Facebook, Twitter, LinkedIn, or Email options, the system will trigger the appropriate action right away—either taking you to your social media account to share the link or opening your default email client so you can send it to your customers.
At the bottom of the modal window, you’ll also see a summary of the appointment details being shared.
Please note:
Bookablesites does not store the generated links, so be sure to copy them before closing the modal window.
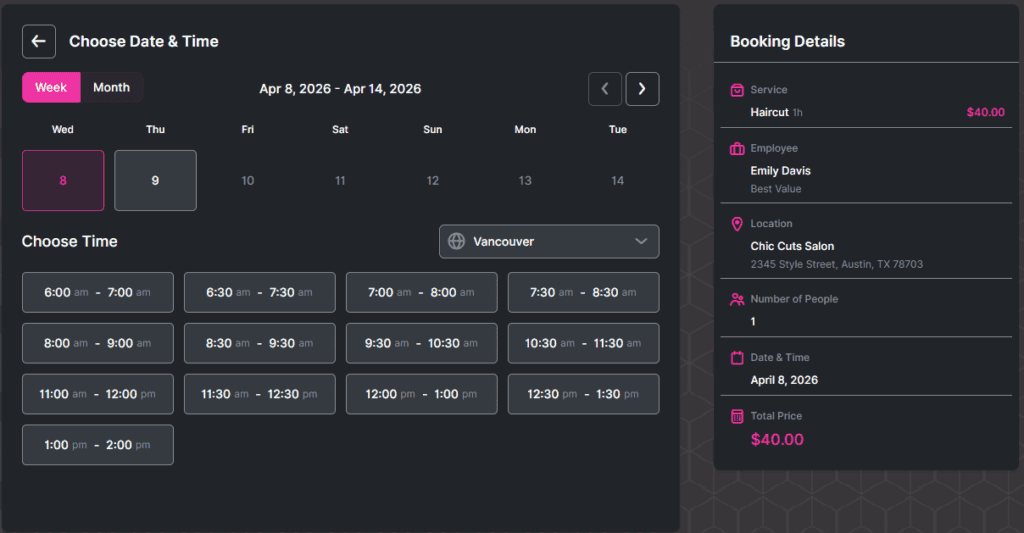
After copying, you can paste the link into a new browser tab to preview exactly what your customers will experience. Depending on your Bookablesites setup and the filters you applied when creating the link, the booking form may open at different stages — from the full selection process (service, employee, and location) to directly displaying the available dates and times for the chosen appointment.
Embed
In Bookablesites, besides the embed code available in the Customize section, you can also control what content you embed on another website through the Category, Service, Employee, Location, and Date filters found in the Share Booking feature.
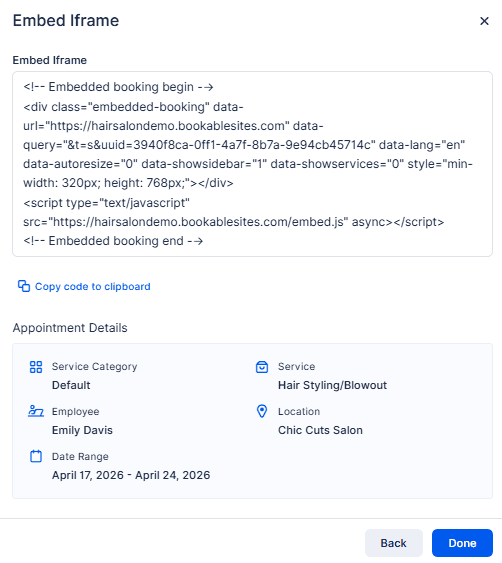
Selecting these options works the same way as with the Share Link method. Once you’ve set your desired filters, Bookablesites will generate an iframe (embed code) that you can easily copy and paste onto any other website. To make the process quicker, there’s a “Copy code to clipboard” button beneath the code, so you don’t need to manually highlight and copy it.
Below the code, you’ll find a summary of the appointment details you’re embedding.
QR Code
When you select the QR Code option in Bookablesites, you’ll be given two ways to proceed:
- Set Appointment Parameters – works the same as in the Share Link and Embed options, allowing you to define filters like service, employee, location, and date before generating the QR code.
- Get a QR Code Immediately – instantly creates a QR code that functions like your full Booking Website, enabling customers to complete the entire booking process from start to finish.
After the QR code is created, you can either copy its URL or download the image to share directly with your clients.

If you select the Email option in Bookablesites, after setting up your booking preferences, an email template will appear that you can quickly copy using the “Copy to clipboard” button.
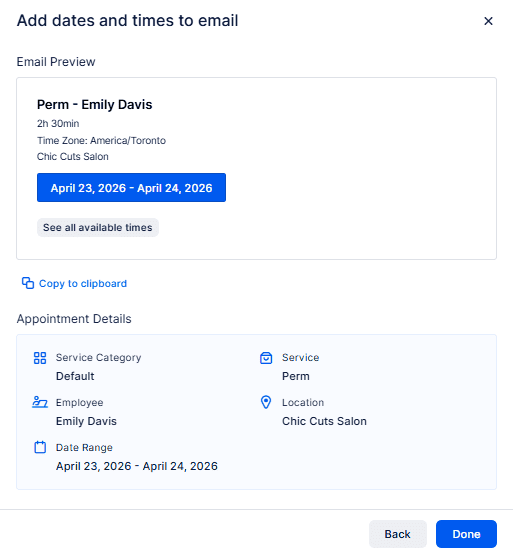
When you paste this code into an email, it will appear exactly as it does in the Bookablesites “Share Booking” modal window.
Social Media
Once you’ve set the filters for the content you want to share in Bookablesites, you’ll be presented with seven predesigned images to choose from for your Social Media Story. The eighth option allows you to upload a custom image of your own.
For the best display quality, it’s recommended to use an image in vertical orientation with a 9:16 aspect ratio (for example, 1080×1920 pixels).
After choosing (or uploading) your image in Bookablesites, click Next to move on to the step where you’ll customize your story’s content.
The Title serves as a brief explanation of what you’re sharing, while the Description field lets you provide more details about the offer for your social media audience. You can pick from the available fonts, adjust the text color, and see all your changes reflected instantly in the live preview below.
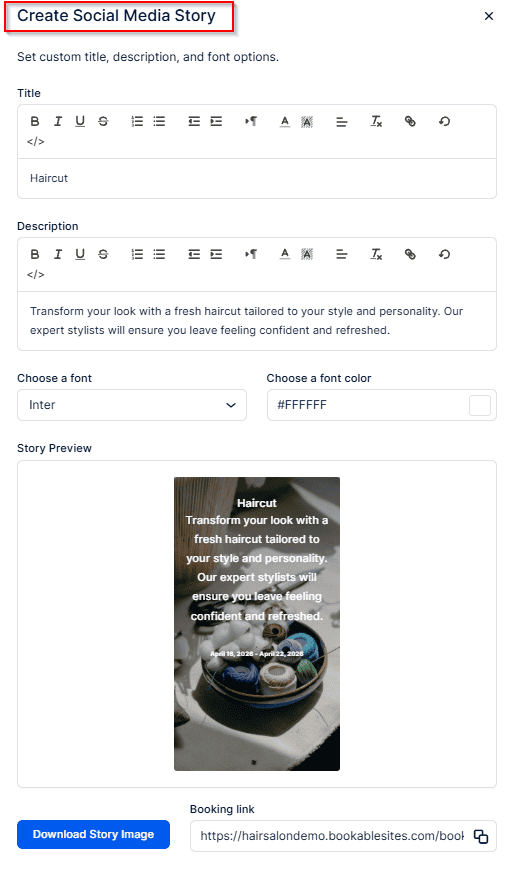
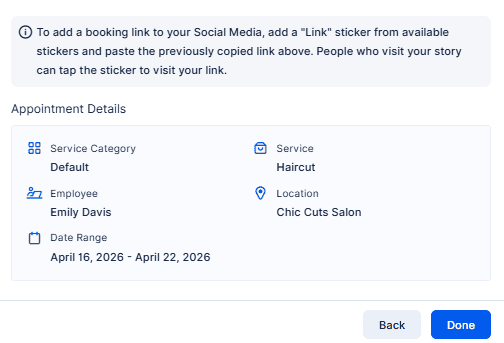
With the generated link, you can add a “Link” sticker from your available sticker options and paste the copied link into it. Viewers of your story can then tap the sticker to open your link directly.
When you’re satisfied with your story design, click “Download Story Image” to save it, then upload the image to your social media account for sharing.