
Synchronize your Bookablesites bookings with Apple Calendar so your availability in Bookablesites reflects busy times in your personal calendar. This integration will add Bookablesites appointments to Apple Calendar and mark those periods as busy, preventing Bookablesites from accepting bookings that overlap with entries in Apple Calendar.
Important Notes:
- Apple Calendar (iCal) is a calendar client, not a standalone calendar service. Because it only displays calendars from other services, you cannot integrate Bookablesites directly with iCal. If your primary calendar is Google or Outlook but you view it in the Apple Calendar app, connect the original calendar service (Google or Outlook) to Bookablesites instead. See the guidance below for details.
- During setup, open two browser tabs for convenience: one with Bookablesites > Settings > Features & Integrations > Integrations > Apple Calendar, and the other with your Apple account page. we recommend opening two tabs in your browser:
- Settings/Features & Integrations/Integrations -> Apple Calendar
- The page of your Apple account
- Full two-way sync is not available yet: changes made in Apple Calendar (reschedules or deletions) will not be propagated back to Bookablesites.
The Apple Calendar connector for Bookablesites is a premium integration and counts toward your allotment of Custom Features & Integrations.
Configure the App-Specific Password in your Apple account
Before you enable Apple Calendar in Bookablesites, make sure your Apple account has two‑factor authentication enabled and an App‑Specific Password generated.
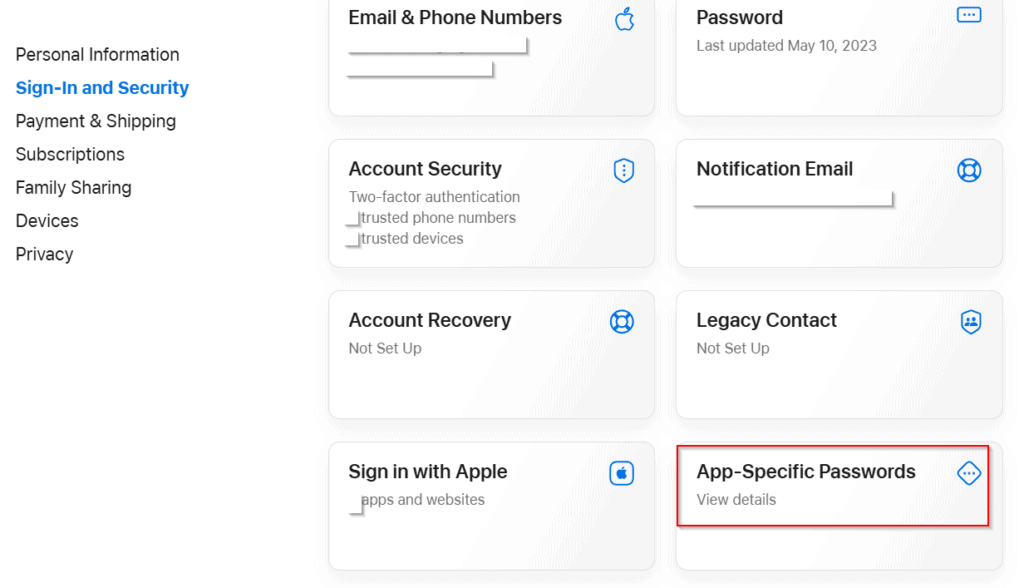
Sign in at appleid.apple.com. Under Account Security, enable Two‑Factor Authentication if it’s not already active. Then go to App‑Specific Passwords and select Generate Password.
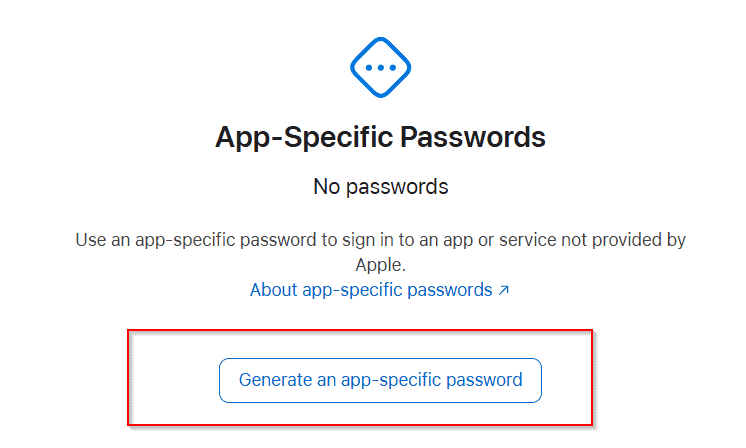
A popup will appear prompting you to click “Generate an app‑specific password.”
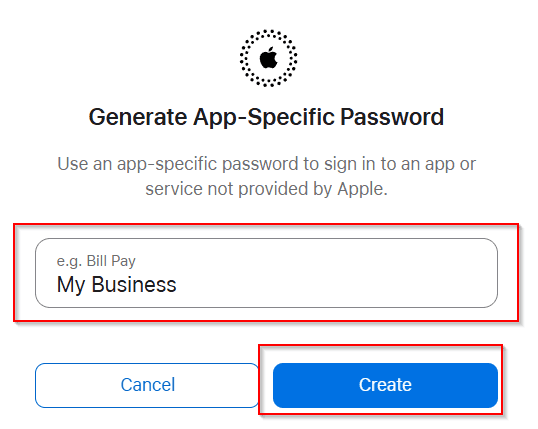
You can name the password whatever you prefer; on the next screen, enter a label (for example, “Bookablesites”) and click “Create.”
You may be asked to re-enter your Apple ID password to verify your identity. After confirming, Apple will display a password in this format:
xxxx-xxxx-xxxx-xxxx
Copy that password (including the hyphens) and store it in a secure place — you will not be able to view it again once the popup closes. With the app‑specific password saved, you can proceed to connect your Apple Calendar to Bookablesites.
If you revoke the app‑specific password later, you will be signed out of the Apple Calendar connection in Bookablesites and must create a new app‑specific password and repeat the setup to restore the integration.
Note: Some users have reported issues generating this password in Safari; if you encounter problems, try using a different browser.
Activate and set up the Apple Calendar Synchronization
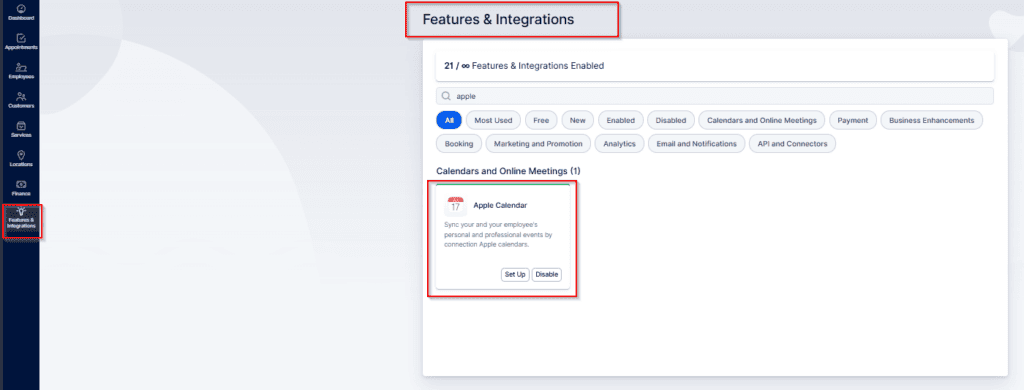
In the other browser tab, go to Features & Integrations, find “Apple Calendar” and click “Enable.” The card will reload and display a “Set Up” button — click it to open the Apple Calendar configuration page.
On the configuration screen, enter your Apple ID email address and the App‑Specific Password you generated earlier.
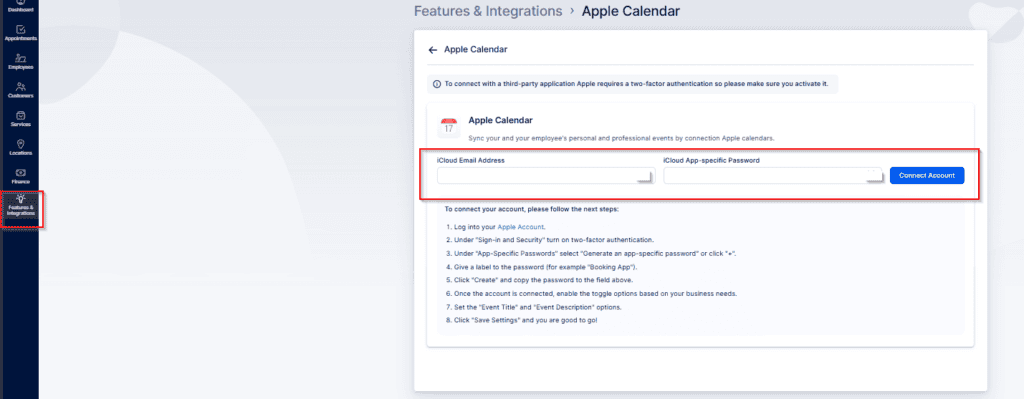
Click “Connect Account” to complete the process — your Bookablesites appointments will then synchronize with Apple Calendar.
Settings for your Apple Calendar Integration in Bookablesites
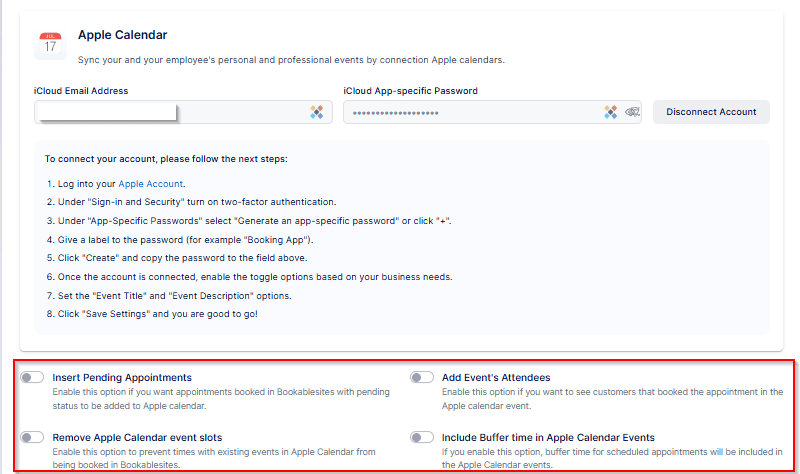
After connecting, you’ll find four options below the instructions:
- Insert Pending Appointments — When enabled, events with Pending status will be added to Apple Calendar. Appointments already Approved are added automatically and cannot be changed.
- Add Event’s Attendees — Useful for group bookings; this adds all customers as attendees in the Apple Calendar event.
- Remove Apple Calendar Busy Slots — Blocks time slots marked Busy in Apple Calendar so Bookablesites won’t offer those times for booking.
- Include Buffer time in Apple Calendar Events — Controls whether buffer time before and/or after an appointment is shown in the Apple Calendar event, so employees see the full unavailable period.
Toggle the switch next to any option you want to enable.
Event Title and Event Description
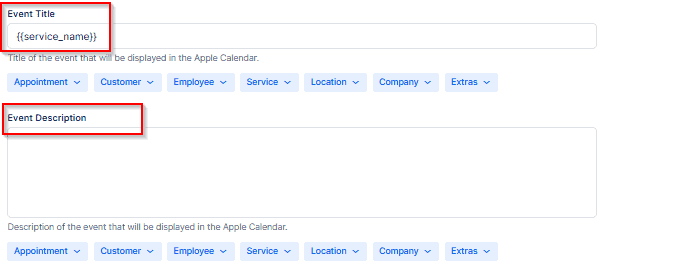
You can customize the Event Title and Description that appear in Apple Calendar events created from Bookablesites by using the available placeholders. Click inside the Title or Description field, then pick the desired placeholders from the dropdown beneath the field. By default, the Title includes only the {{service_name}} placeholder, and the Description is empty.
Connecting the Employees
Link an employee to the appropriate Apple Calendar
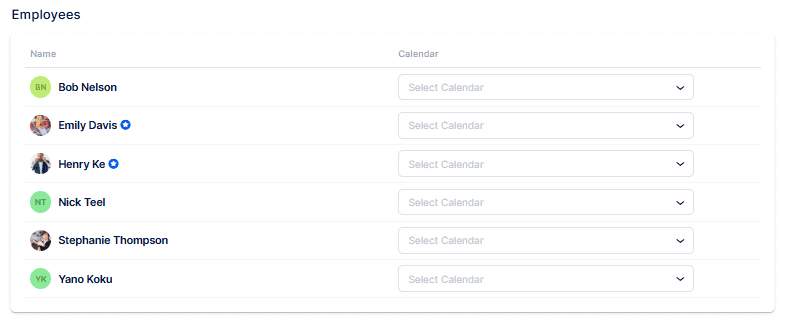
At the bottom of the Apple Calendar settings you’ll find your employee list. For each employee you can choose one of the calendars connected to the main Apple account, or assign the same calendar to multiple employees (useful when they share a workspace and you want to prevent overlapping bookings).
To let employees connect their personal Apple Calendar, first enable their login. For full instructions see Users and Roles, but the steps are::
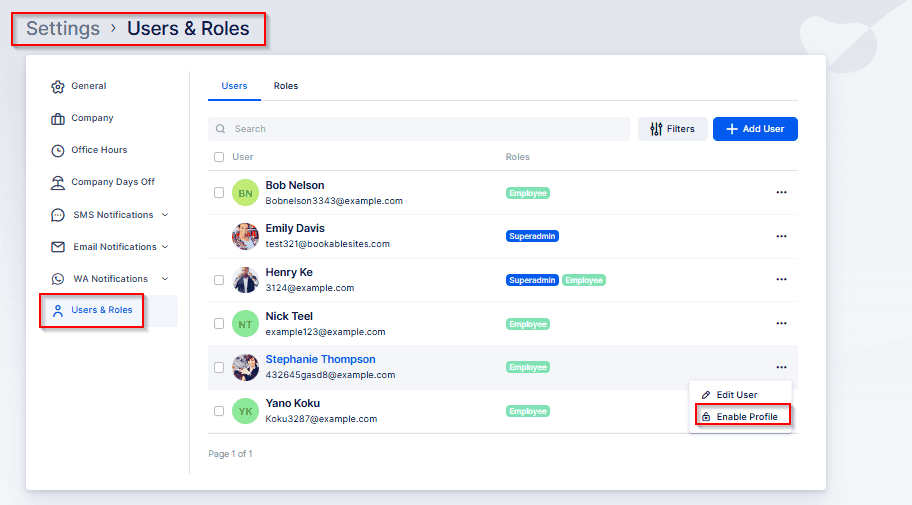
- Go to Settings (bottom-left of the Bookablesites admin).
- Select Users and Roles.
- Find the employee, open the three‑dots menu next to their name, and choose Enable Login.
Choose whether Bookablesites should generate a password automatically or if you will set one manually for the employee. You can also require the employee to change the password at first login or simply send them the credentials.
After the employee receives their login details, they can sign in to Bookablesites and go to Account Settings to connect their Google account to their employee profile.
To open Account Settings under employee and edit employee profile, click the user name in the top-right corner.
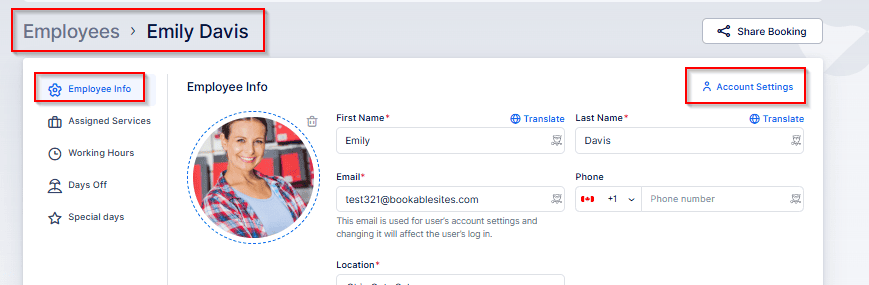
This will open a new window where the logged-in employee can update their personal information, change their password, and manage their schedule (if their user role allows). Most importantly for this integration, they can access the Integrations section and log into their personal Apple account.
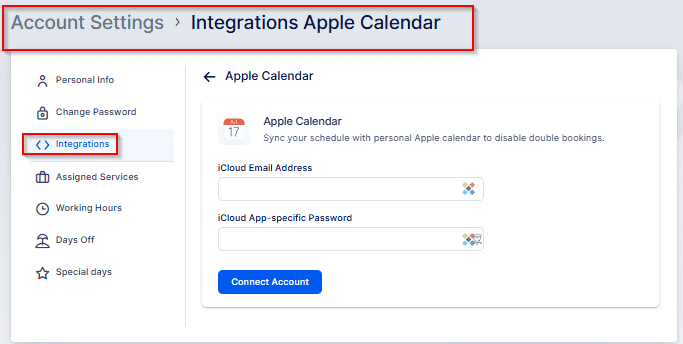
Once in Integrations, select “Apple Calendar.”
There the employee should enter their iCloud email address and the app‑specific password created earlier. After providing both, click “Connect Account” to complete the link.
Can’t see your calendar?
iCloud calendars added by subscription (via URL) cannot be linked to Bookablesites.
In Apple Calendar’s left sidebar, subscribed calendars show a dimmed icon. If selecting that icon reveals a URL, it means the calendar is a public subscription and Bookablesites cannot connect to it.
Bookablesites cannot connect to calendars added by URL subscription in iCloud. However, you can link a private iCloud calendar that someone has shared with you if they grant you View & Edit access — ask the calendar owner to change the sharing permissions if needed. Learn more about sharing iCloud calendars.
Time Zones
Apple Calendar assigns a time zone when you create an event, which can cause confusing results if you travel. For example, scheduling a meeting while in New York for “noon” will appear as 3:00 p.m. when you return to Los Angeles because the event was created in Eastern Time. To fix this, edit the event time.
To avoid these mismatches, open Calendar > Preferences > Advanced and enable “Time zone support.” With that on, a “Time zone” option appears when selecting an event time; you can choose the event’s time zone or set it to “Floating” so the event time won’t shift as you change time zone views. This is useful for frequent travelers.
The invitation has been declined
Declined invitations: By default, Apple hides events you’ve declined. To check if that’s the reason, open the View menu and enable “Show declined events.”
The calendar is hidden
Hidden calendars: Often an event isn’t visible because its calendar is not selected. Find the calendar in the left sidebar and enable its colored bar.
Unknown calendar assignment: If you can’t remember which calendar an event was saved to, show all calendars and look for the event’s highlight color (or the dot color in month view). If the event still doesn’t appear, enable other calendars as well — settings may have been changed accidentally.