
Custom Fields (also called Extra Form Fields or Intake Forms) let you collect required customer information before appointments. These fields are added to the final step of the booking form.
Available field types:
- Text — a short input for brief text (up to 255 characters), useful for short descriptions or notes.
- Text Area — a larger text box for longer responses (up to 1,000 characters).
- Text Content — static text shown in the form for instructions, descriptions, or messages.
- Selectbox — a dropdown list where users pick one option from predefined choices.
- Checkbox — offers multiple selectable boxes so users can choose one or more options.
- Radio Button — displays mutually exclusive options where the user can select only one.
- Date Picker — opens a calendar widget so users can pick a specific date.
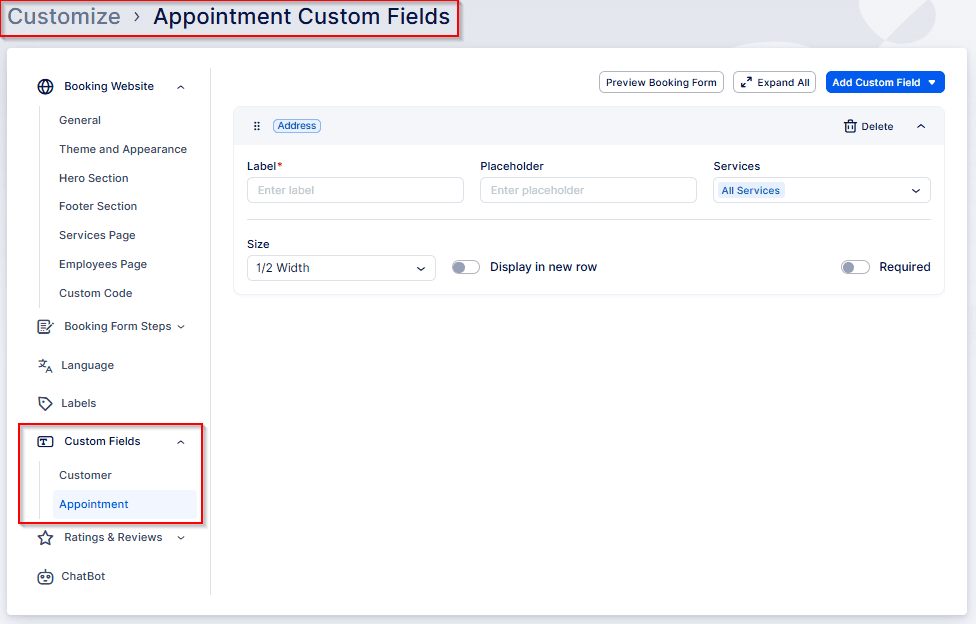
- Address — a dedicated field with Google Maps autocomplete to help users enter addresses accurately; suggestions appear as they type.
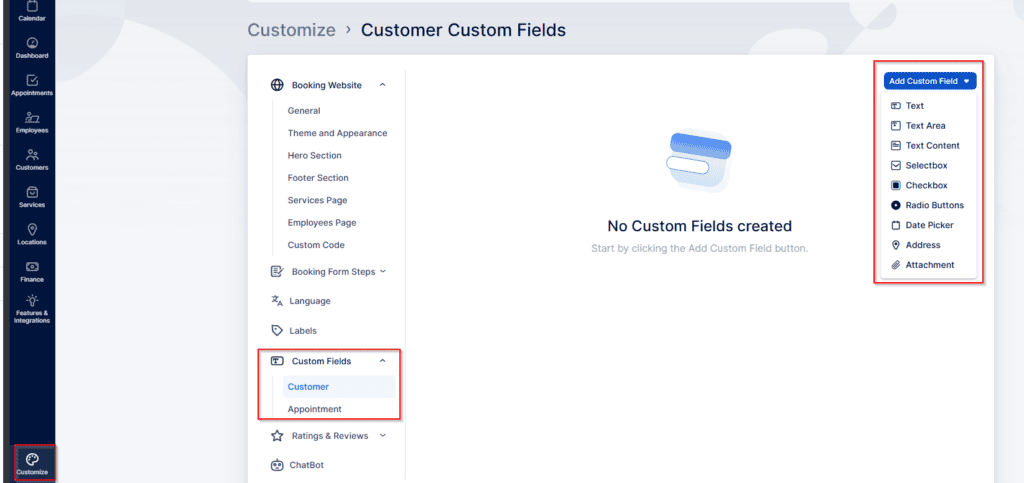
Attachment — lets customers upload files with their booking or appointment, so they can provide documents, images, or other supporting files.
When you add an Attachment custom field, an “Add upload requirements” toggle appears beside the “Required” setting. Turning this on displays the upload rules to customers:
- Maximum file size: 20 MB
- Allowed file types: .jpg, .gif, .png, .tiff, .webp, .svg, .doc, .pdf, .ppt, .pptx, .docx, .txt, .zip, .tar, .7z, .rar
If you turn the toggle off, those requirements won’t be shown to customers.
The Custom Fields feature for Bookablesites is a premium capability and will count toward your total Custom Features & Integrations allowance.
How to enable custom fields
Like other custom features, open the Features & Integrations section, scroll to find Custom Fields, and click “Enable” to activate it.
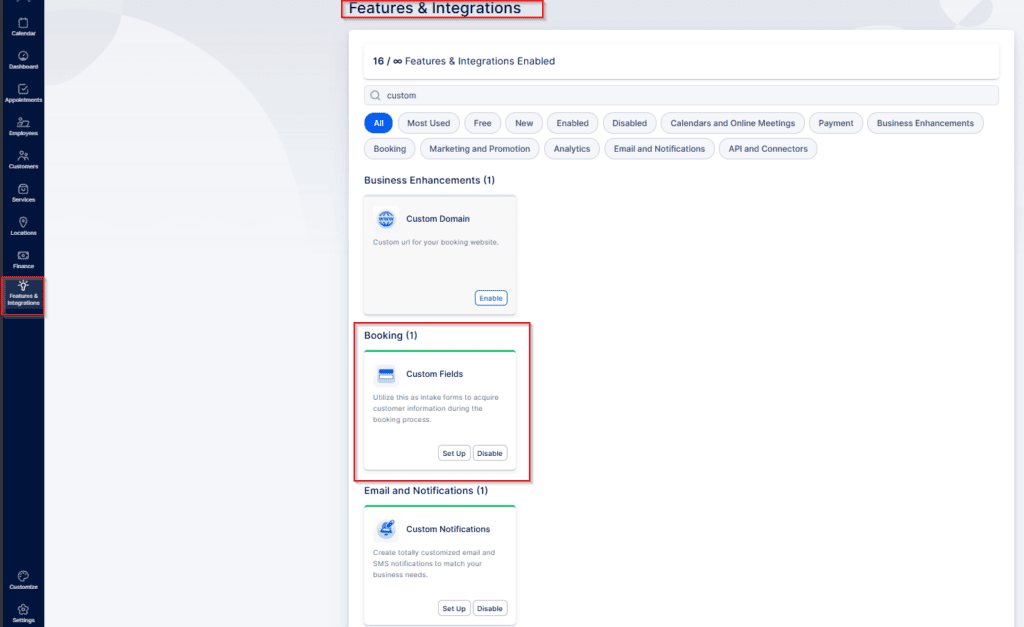
AAfter you enable this feature, click the “Set Up” button on the same card or go to Customize > Custom Fields.
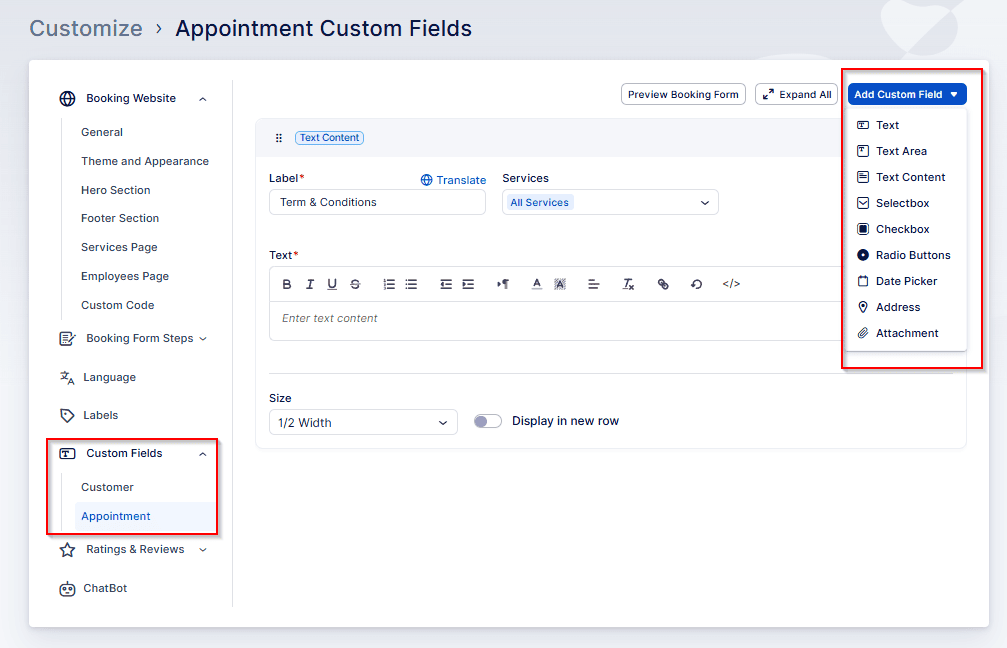
Opening the Custom Fields tab reveals two options:
- Customer
- Appointment
Customer-related Custom Fields store information linked to a customer’s profile. Appointment-related Custom Fields are tied to the specific appointment and will appear on every booking.
When you click the “Add Custom Field” button on the right, a dropdown will appear letting you choose from the available custom field types.
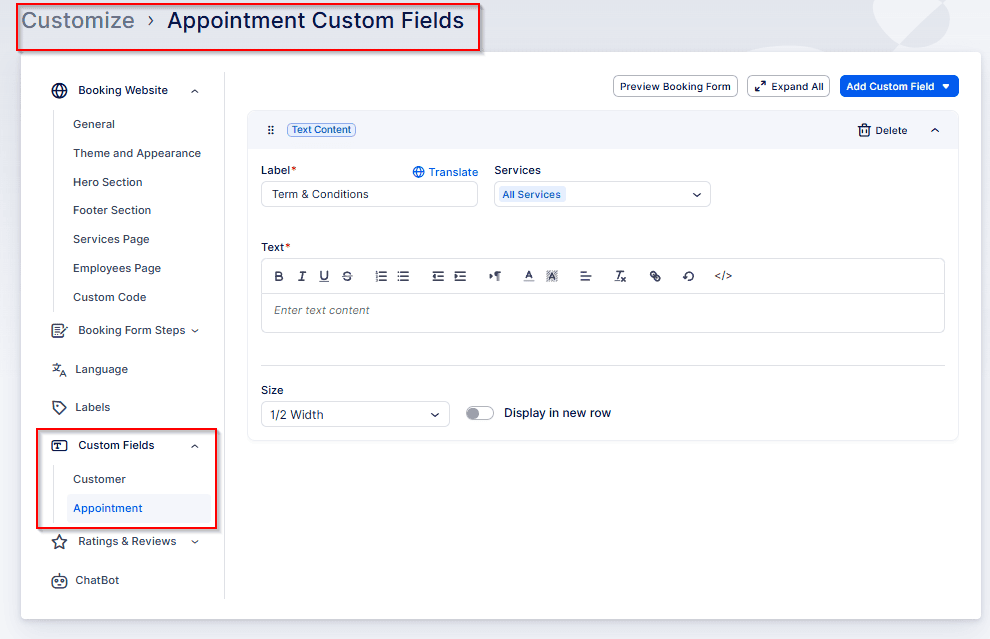
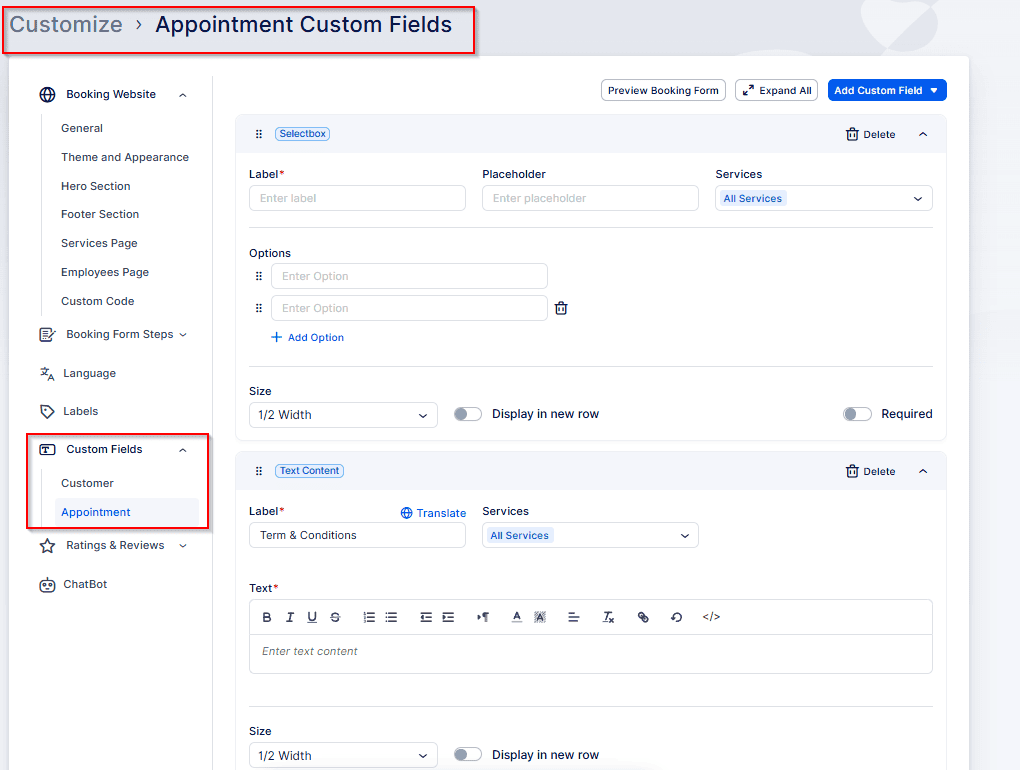
When adding appointment-related custom fields, you can set the following:
- Label: The field’s name or title.
- Placeholder (if applicable): Text shown inside the field before the user enters a value.
- Services: Choose which services will display this field.
- Required toggle: Specify whether the field is mandatory or optional.
- Field size: Decide how much space the field takes up on the booking form.
- Display in new row: Toggle to place the field on its own row.
If you add a custom field that provides multiple options (selectbox, checkbox, or radio button), you will also need to define the options that will be offered to the customers:\
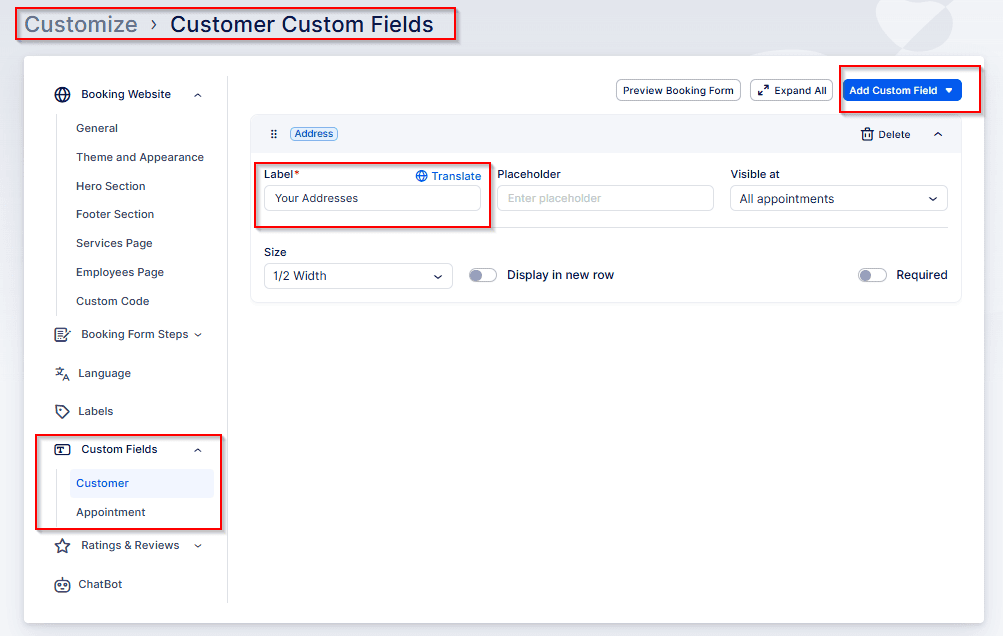
When adding customer-related custom fields, you can configure nearly the same options as for appointment fields. The only difference is the Services setting — here you choose where the field will be visible:
- On All Appointments, or
- On the First Appointment only
Once you’re done adding the custom fields, they will be shown on the last step of the booking form:
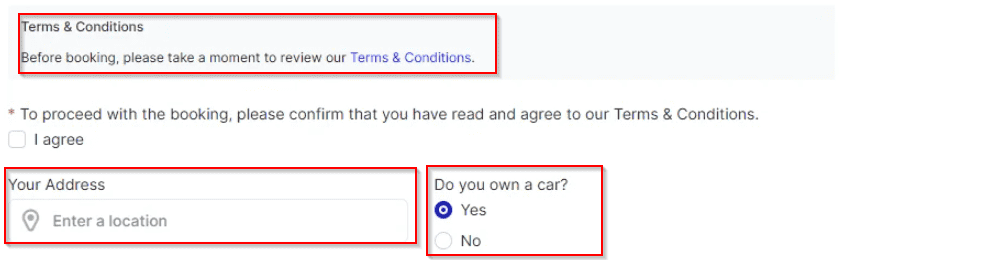
Any URLs included in Radio Button, Checkbox, or Text Content custom fields will appear as clickable links on your booking form, allowing you to direct customers to other pages.
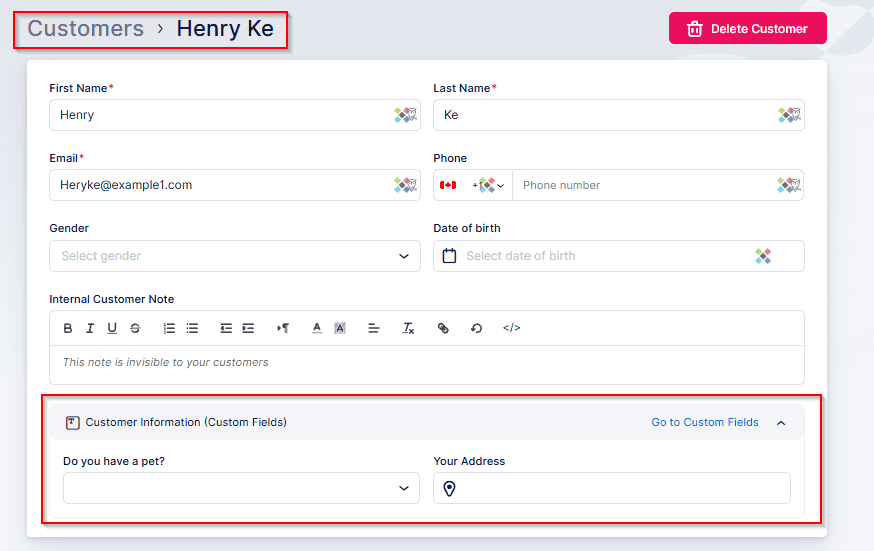
After customer-related custom fields are completed, their values will be stored in the Customers section and visible when you view or edit a customer in Bookablesites.
Custom fields filled in by customers will be visible on both the Calendar and Appointment pages — you can see them by opening an appointment or editing its details.
You can include these fields in notifications sent to customers. Note, however, that custom fields not assigned to all services won’t be available in default templates or in Custom Notifications that target “all services.” If certain custom fields apply only to specific services and you want them in templates, create templates dedicated to those services.
When you open the Custom Fields dropdown above the templates, each field appears twice: once as custom_field_1 and once as custom_field_label_1.
custom_field_label_1 contains the label you set when creating the field in Bookablesites.
custom_field_1 holds the value the customer entered.
Before you create Custom Fields, take time to decide exactly what information you need from customers during booking — for example age, special requirements, preferences, or any other details that help you deliver better service. Once you identify those data points, create Custom Fields to capture them. These fields let you collect and organize the information most relevant to your business or service, making the booking process smoother and more efficient for both you and your customers in Bookablesites.