
In Bookablesites, Employees are the individuals who deliver services within your business. Depending on your subscription plan, you may operate as a solo provider or manage a team of multiple employees. As an admin, you can easily set up employees, define their schedules, and track their performance and activities.
If you’re a solo business owner, Bookablesites automatically creates your first employee profile using the information you entered during onboarding. It’s essential, however, to ensure that this employee is connected to at least one service. If that step wasn’t completed earlier, you can follow this guide to set it up now.
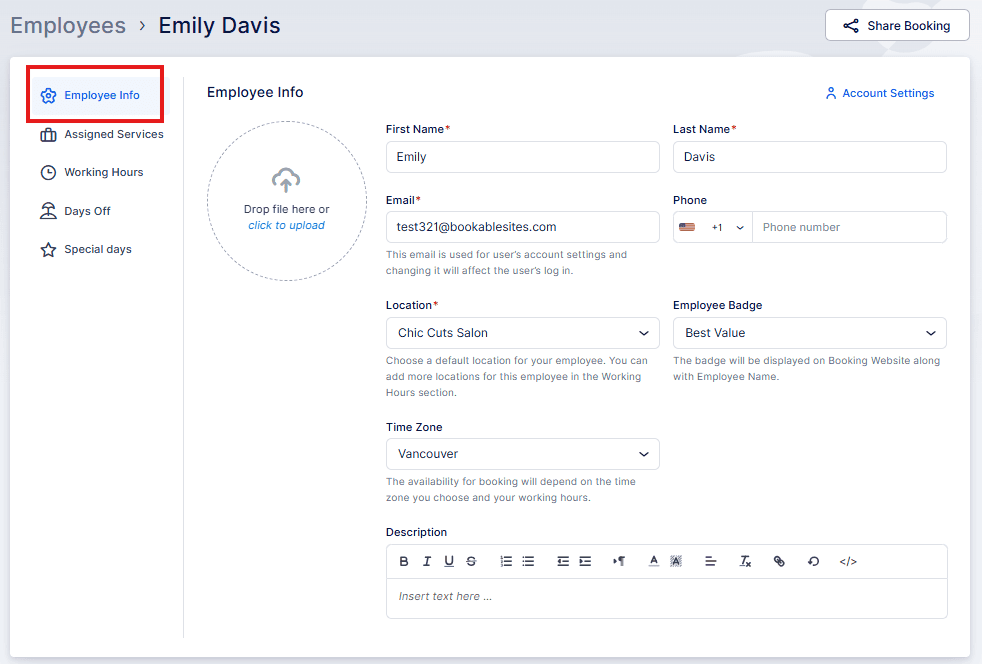
Employee Information
- First Name: A mandatory field that must be completed.
- Last Name: Also required for correct identification.
- Email: Each employee must have a unique email address. This email is used to create their user account in Bookablesites and serves as their main contact for notifications and login.
- Phone: The default country code is derived from your General Settings, but you can update it for each employee as needed.
- Location: This field appears only when at least one business location exists in your Locations section. Each employee must have a Default Location, especially if your company operates from more than one site. Employees can, however, work at different locations during their assigned hours
- EEmployee Badge: Bookablesites includes three default badges—Best Value, Most Popular, and Premium. You can edit these or create new badges to highlight employees on your booking website and showcase top performers.
- Time Zone: The default time zone is set in Bookablesites General Settings, but you can configure an individual time zone per employee. This ensures that each employee sees appointments in their local time, while admins view them in their own.
- Description: Use this field to describe the employee’s background, work style, and expertise. A well-written description helps customers choose the right provider and builds trust in your business.
If you configured the Zoom, Microsoft Teams, or Google Meet integration through their respective pages in Features & Integrations and linked your employee with Google/Zoom/Microsoft accounts, these platforms will appear as locations in the employee’s profile.
Employee Badge
The Employee Badges feature in Bookablesites lets you highlight standout staff members on your booking page. You can choose from default options (Best Value, Most Popular, Premium) or create custom badges suited to your business.
Badges are perfect for promoting top-performing employees, helping customers find recommended providers, or distinguishing specialists with unique skills—all of which can boost engagement and bookings.


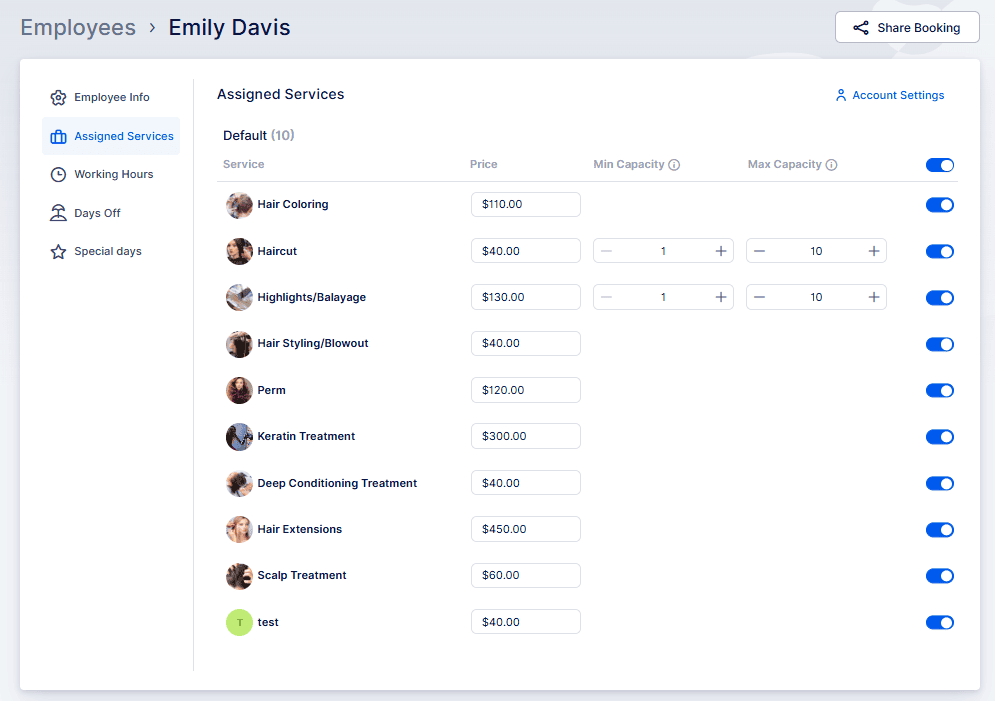
Assigned Services
Within the Assigned Services tab, you can specify which Categories and Services each employee provides. You can also set custom prices or adjust minimum and maximum capacities per employee for added flexibility.
When you modify prices or capacities, Bookablesites will prompt you to decide whether the change applies to all employees or just the selected one—making it easy to manage both uniform and individualized settings.
On the booking page, if multiple pricing options exist, services will display “From” next to the lowest price. During the Choose Employee step, customers will see a + or – sign with the price change shown in parentheses, ensuring complete transparency.
Working Hours
This section allows you to define each employee’s work schedule—either fixed throughout the week or customized per service or location.
By default, the working hours set during onboarding mirror your Office Hours and apply to all assigned services and the default location. However, you can freely adjust or expand them.
You can also set limits on how many appointments an employee can have per day, week, or month. These limits override the available time slots automatically..
If appointment slots aren’t showing on your booking website:
Service and Location Assignment:
- Verify service and location assignments in working hours: Make sure the employee’s working hours include all assigned services and the default location, unless you’ve intentionally customized otherwise. Edit the employee’s working hours and confirm that the correct services and locations are linked to each working period. You can also review this on the Employees page; any employee without assigned services will show an orange notice at the top.
Service Duration Compatibility:
- Confirm the service length fits the working periods. The combined Service Duration plus any buffer time before and after must be less than or equal to the length of the working period. If the Service Duration is longer than the available time, the service won’t fit into the period and all days may show as unavailable for booking.
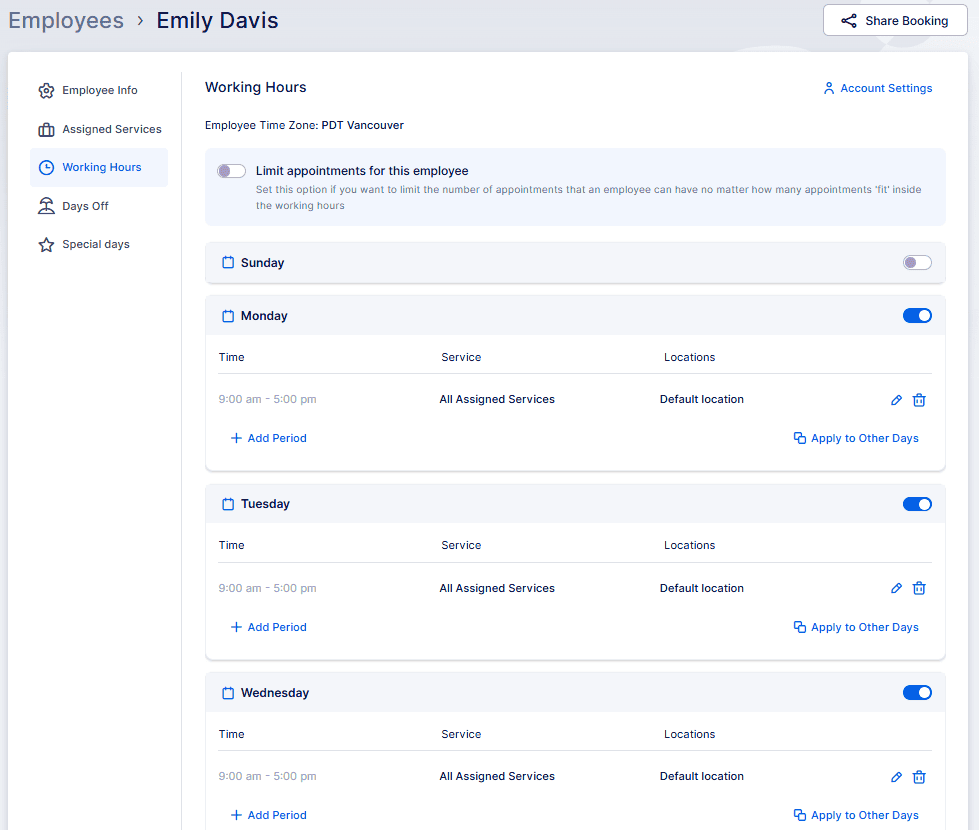
The “Apply to Other Days” option (bottom-right corner of each schedule) allows you to copy one day’s working periods to other days. When selected, a popup will appear letting you choose whether to apply the schedule to all days or specific ones.
Break Periods:
Although Bookablesites doesn’t have a specific “break time” feature, you can simulate breaks by creating multiple working periods. Any time between these periods will automatically be treated as a non-working break.
For example:
- If you create two working periods: 09:00 – 11:00 and 12:00 – 15:00,
- The time between these two periods (11:00 – 12:00) will act as a break period for the employee.
Days Off
The Days Off section allows you to manage vacations, holidays, or sick leave for employees.
To add a day or range of days off:
- Click + Add Day Off (top right corner).
- This opens a popup where you can:
- Name the Day Off.
- Select a single day by double-clicking the date.
- Select a range of dates by clicking on the start and end dates.
- Specify whether it repeats yearly (e.g., Christmas) or occurs once (e.g., personal vacation).
This helps keep schedules accurate and ensures employees aren’t available when they’re off duty.
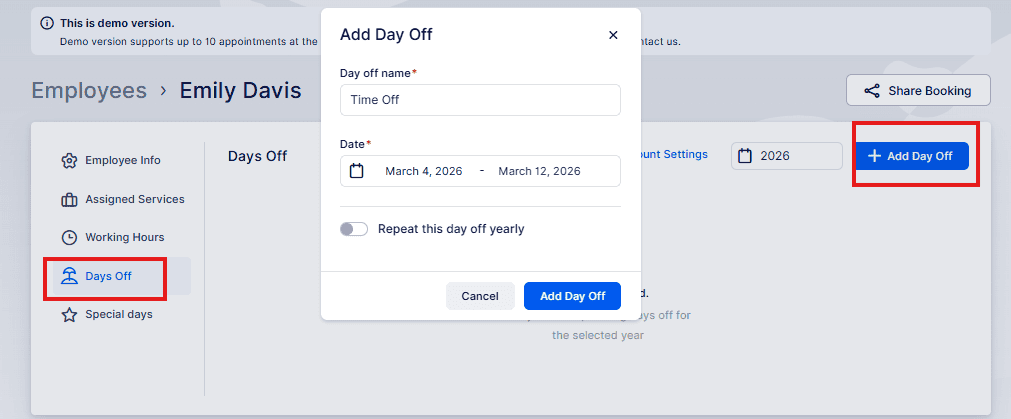
Once you click on “Add Day Off”, you’ll see a popup at the bottom of the screen, where you’ll need to Save Changes.
Special Days
Please Note: The Special Days Feature is enabled by default when you start your free trial but it is a custom feature that needs to be enabled on the Features & Integrations page, so if you don’t see it in the Employee’s profile, make sure that it’s enabled first.
Special Days let you handle exceptions—like a temporary change in working hours or unique events.
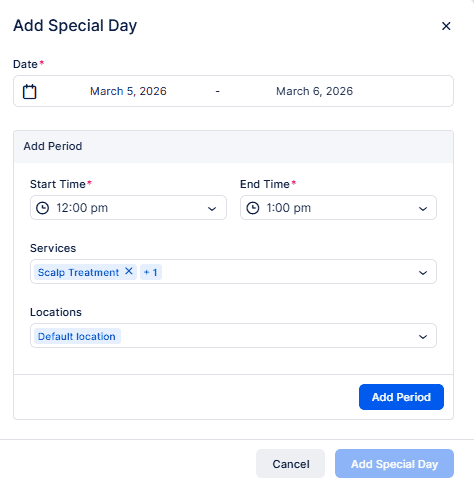
To add a Special Day:
- Click + Add Special Day.
- A popup will appear where you can:
- Select a single day or a range of dates.
- Adjust the time periods for these special days.
- Ensure the time periods cover the employee’s absence or altered schedule.
For instance, if an employee has a doctor’s appointment on August 2 from 12:00–13:00, you can create a special schedule for that day excluding those hours.
This feature ensures your schedules remain accurate even during special circumstances.
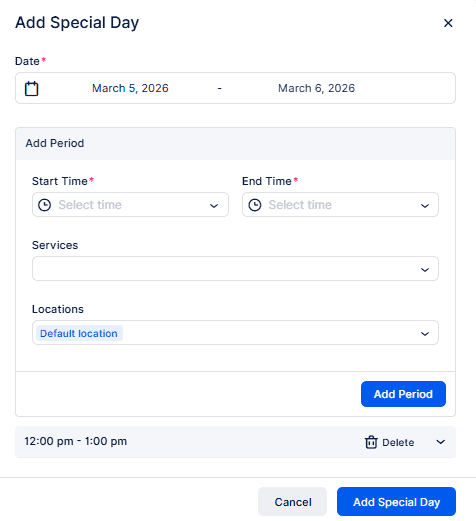
After setting all necessary periods, click Add Special Day, then Save Changes at the bottom to confirm. You’ll notice that this period has been minimized in the popup. Clicking it will allow you to edit it.
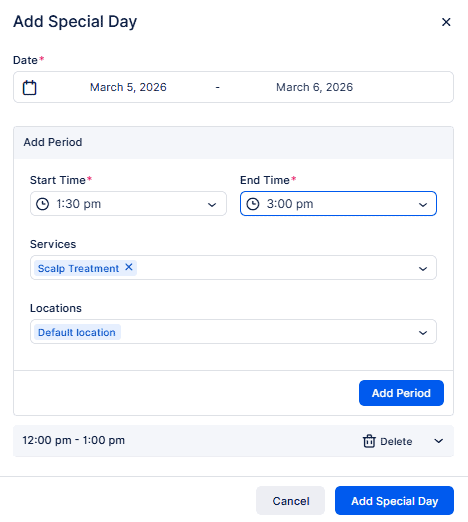
If you intend to include several periods for a Special Day, it’s important to add them in sequential order. For instance, add 12:00 – 13:00 first, followed by 13:30 – 15:00. The order matters because the initial period you add will block time slots preceding it. If you add 13:30 – 15:000 before 12:00 – 13:00, you won’t be able to select the earlier period afterward. This sequence ensures the correct scheduling for the employee’s special circumstances.
After adding the first period, such as 12:00 – 13:00, proceed to add the next period, like 13:30 – 15:00. Click on “Add Period” again if there are additional time slots needed. Once all the necessary periods are added, click on “Add Special Day” to save the entire schedule. It’s crucial to remember to click “Add Period” for each new time slot; otherwise, the Special Day will be saved with only the first period included
After clicking “Add Special Day,” a popup will appear at the bottom of the screen. Here, you’ll need to click “Save Changes” to ensure that the Special Day is saved with all the configured time slots and details.
Working with employee list and tracking their business
On the Employees page, you’ll find a complete list of all employees with their key information such as photo, name, email, and phone number. If you have a large team, you can use the Search and Filter options to locate employees by name, assigned service, or location.
To manage your employees, you have a few options:
- Bulk Delete: Select multiple employees using the checkboxes, then click Delete at the top.
- Individual Deletion: Use the checkbox or the three-dot menu next to the employee’s name, then select Delete Employee.

If the employee has future appointments scheduled, you will receive a warning prompt asking for confirmation before deletion. If you proceed with deletion, both the employee and their future appointments will be removed permanently.
Please note that this action cannot be undone.
The three-dots menu (…) also allows you to
- Edit Update employee details, assigned services, or schedules.
- Reset the password Quickly reset login access.
- Share the booking Generate a link featuring the employee preselected.
- Disable the employee Temporarily prevent bookings for that employee.
As for tracking employees’ performances, this can be done by simply clicking on one employee from the list. Once you click on the employee, the sidebar with additional info will open and show:
- Employee’s picture,
- First and last name,
- Working hours,
- Employee’s business for the next 7 days including:
- Number of appointments,
- Cashed (earned money, counting only paid appointments)
- Percentage of load (counting the number of booked hours compared to the total number of available hours set in working hours)
- Hours in appointment (number of booked hours)
- The three-dots menu (…) from where you can generate a Booking Link, Edit, or Delete the currently selected employee.