
In addition to the default Email and SMS notifications included with your Bookablesites account, you can create custom notifications tailored to your business. These allow you to target employees or customers, choose the timing, and select which services they apply to — helping you personalize customer communication and streamline team notifications.
Custom Notifications is a premium Bookablesites feature and counts toward your total Custom Features & Integrations allowance.
After enabling Custom Notifications on the Features & Integrations page, click the Set Up button to open the Email Notifications area. There you’ll see a new +Create Notification button in the top-right. Enabling this feature also adds the same option to the SMS Notifications page, so you can create custom messages for both Email and SMS.
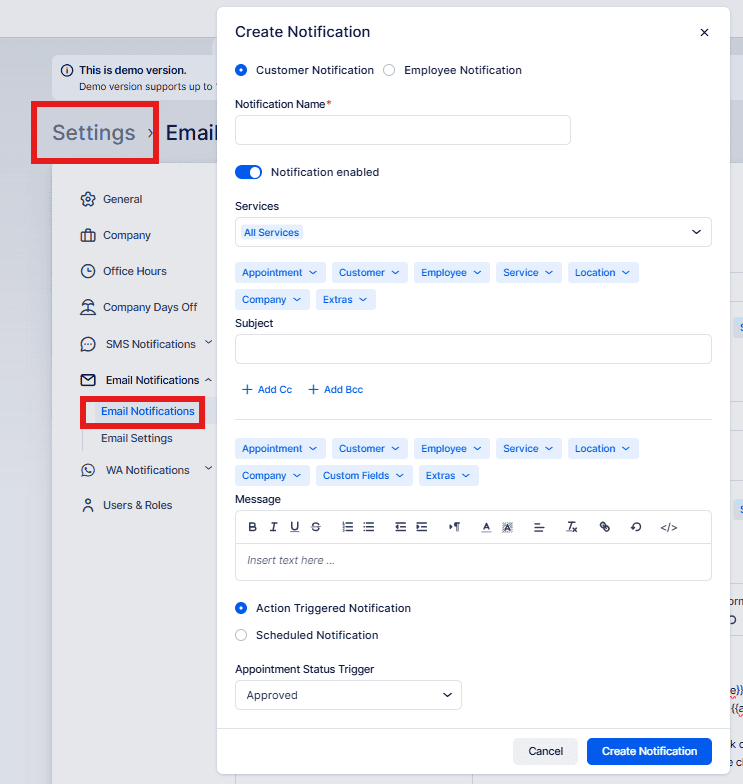
Pressing +Create Notification opens a configuration panel where you set:
- Customer/Employee Notification: Pick whether the notification is for customers or employees.
- Notification Name: Give the notification a name to identify it easily.
- Notification enabled: Toggle this on to activate the notification; you can disable it later.
- Services: Choose which services trigger this notification.
- Subject: Provide the email subject line.
- Message: Write the message body, using placeholders for appointment-specific details.
- Action-Triggered Notifications: If selected, specify an action that fires the notification (for example, a change in appointment status). Choose the trigger from the Appointment Status Trigger dropdown.
- Scheduled Notifications: If selected, define when the notification should be sent relative to the appointment. Use the Schedule dropdown to pick before or after the appointment, then set the interval in the Choose when field (minutes, hours, days, weeks, months).
When you finish configuring the options, click Save to store the custom notification. You can return at any time to edit or delete notifications. This feature gives you flexible control over communications with both customers and team members.
After you click “Create Notification,” the notification is saved and will be dispatched based on the settings you specified. It will appear in the list with your other notifications under either the “To Customer” or “To Employee” section, depending on which option you picked.
You can open and edit the notification at any time after creation to change its settings or disable it if necessary.