
If you use multiple Pixels via Google Tag Manager (GTM) and run campaigns on different channels, linking your Bookablesites Booking Page to GTM lets you capture important metrics and traffic sources. This connection supports remarketing and provides more comprehensive analytics.
The Google Tag Manager integration for Bookablesites is free and does not count against your allotment of Custom Features & Integrations.
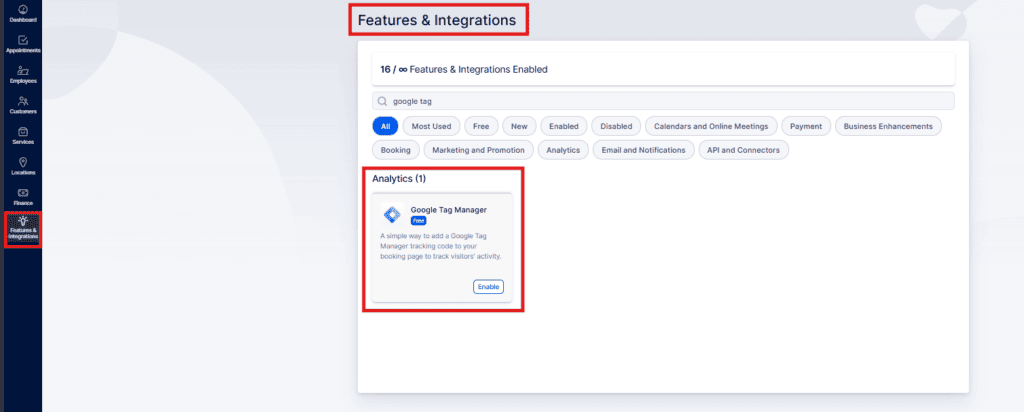
To turn it on, go to Features & Integrations in Bookablesites, find “Google Tag Manager,” and click “Enable.”
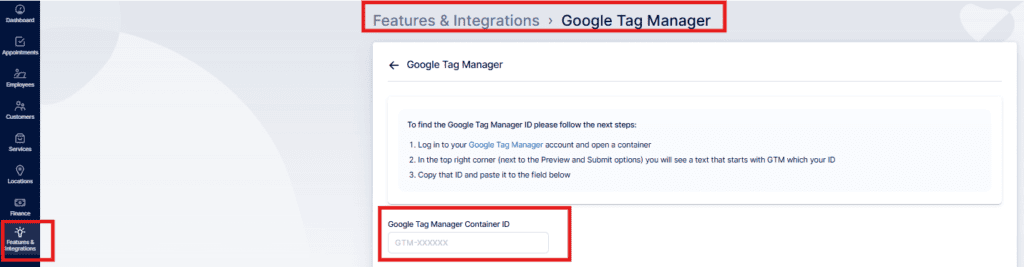
After activation, the card will reload and show a “Set Up” button. Click it to open the setup page, which explains how to find your Google Tag Manager Container ID — then paste that ID into the provided field.
After pasting the Container ID, click “Save Changes” at the bottom of the page to link your GTM account to Bookablesites.
Note: Bookablesites sends a custom event named “trafft_booking_success” to GTM. To verify the event, use GTM’s Preview mode and test the booking URL.
Because Bookablesites uses dynamic booking routes, a conversion destination like “/step-4” may vary (for example, a user entering the flow from service details could reach “/step-3” instead). Keep this in mind when defining conversion URLs.
Custom event details to use in GTM:
- category: ‘TRAFFT_BOOKING’
- event: ‘trafft_booking_success’
- action: ‘trafft_booking_success’
- label: ‘trafft_booking_success’
- value: ‘trafft_booking_success’
Use these parameters to configure custom event tracking in GTM and monitor successful bookings on your Bookablesites Booking Page.